Quantcast
Channel: Xojo Programming Blog
Viewing all 882 articles
Browse latest View live

XojoTalk 028 – Email is Not a Project Management Tool


Develop Faster: Using Xojo To Make iOS Apps

$
0
0

Xojo is a great way to start making iOS apps. Whether you an app developer or you are just learning and want to make your own iOS apps, here are some reasons why you ought to look at Xojo.

It’s Simple

Xojo makes it easy to get started with you first iOS app. When you select iOS in the Project Chooser, you get a clean, simple project with a default view:

Xojo Default Project

From here you can start creating the layout for your user interface by simply dragging and dropping controls from the Library. Xojo has many iOS controls, including:

  • Button
  • Segmented ControlToolbars
  • Table
  • Date Picker
  • Location
  • Messages
  • Sharing Panel
  • Picture Picker
  • Slider
  • Switch
  • Text Field
  • Text Area
  • Label
  • Canvas
  • Line, Oval, Rectangle, Separator
  • Progress Bar, Progress Wheel
  • HTML Viewer
  • Image Viewer
  • Scrollable Area

Xojo also supports different layout options including tabs and splits.

Because Xojo uses an event-driven programming model, you can simply add your code to event handlers on your controls. And speaking of code, the Xojo programming language is fully object-oriented, type-safe, easy-to-read and uses automated reference counting (ARC) for memory management.

The iOS framework is fully documented at the Xojo Dev Center and Xojo itself has over 50 iOS example projects included for you to modify and learn from. This is the Xojo Notes example app running in the iOS Simulator:

Xojo Notes App
Xojo Notes App

It’s Native

As mentioned above, Xojo only uses native iOS controls. This means your controls work like you expect and they match the look and feel of iOS. If Apple changes the way the controls look you won’t have to do anything more than rebuild your app.

Xojo also supports the powerful Declare command which allows you to directly access the underlying native controls and the Cocoa Touch framework so you can access methods and classes that Xojo does not yet include.

Speaking of which, there are several 3rd party and open-source libraries of iOS code that are already available to help you extend your Xojo iOS apps when necessary.

It’s Rapid Application Development

The development process with Xojo is incredibly fast, truly it’s Rapid Application Development. Click Run to nearly instantly run your project in the iOS Simulator for testing and debugging. The built-in debugger lets you step through your code line-by-line as you watch variables and values change.

Xojo uses the LLVM compiler, fine-tuned to produce high-performing native 64-bit apps without you having to learn arcane compiler settings.

It’s Multi-Platform

Xojo creates more than iOS apps, of course. It also builds desktop, web, console and Raspberry Pi apps. Often it is useful for an iOS app to have companion apps that work on desktop and web – with Xojo you can easily create all these apps using a single tool and language. And you can even share non-UI code between different types of projects allowing you to ship your apps faster than you ever thought possible.

Develop Faster With Xojo

All in all, you can develop faster with Xojo. Don’t get bogged down with multiple development tools and different languages. Download a time-unlimited trial of Xojo for free to see just how easy it is to get started making iOS apps.

Download Xojo

iPad Apps and ITMS-90474 Error

$
0
0

Starting with iOS 9, some iPads now support app multitasking which allows you to use more than one app at a time on the device. These apps can be displayed side-by-side or with an overlay. Your Xojo iOS apps support this feature automatically when all the Supported Orientations for the iPadScreen are turned on for your app.

If you want to turn off any orientations, then your app will not support app multitasking and you will also get an error when uploading the App to iTunes Connect: “ITMS-90474 Invalid Bundle”.

To avoid this error, you just need to supply a plist that tells Apple that your app wants to opt out of app multitasking. The plist simply sets the UIRequiresFullScreen value to True:

<?xml version="1.0" encoding="UTF-8"?>
<!DOCTYPE plist PUBLIC "-//Apple//DTD PLIST 1.0//EN" "http://www.apple.com/DTDs/PropertyList-1.0.dtd">
<plist version="1.0">
<dict>
   <key>UIRequiresFullScreen</key>
   <true></true>
</dict>
</plist>

To provide this plist, create a text file called “Info.plist” and paste the above code into it. Then drag the file into your iOS project. It will be included automatically when you build your app.

More information about iOS Screens is in the Xojo User Guide.

Quickly Reducing Image File Sizes

$
0
0

I recently had a folder full of jpg and png images that I wanted to reduce in size (the file sizes, not the image dimensions). There were about 850 images totaling about 56MB. I did a quick Google search and found OS X Preview could change the image dimensions pretty easily and maybe even save the files in a different format, but not if they were different formats to start with.

But silly me, this is the perfect thing for Xojo. And in fact, it only took 10 lines of code. I just created a new desktop project and dragged a button onto the Window. In its Action event I added this simple code:

  // Prompt for folder containing pictures
 Dim f As FolderItem = SelectFolder
 If f Is Nil Then Return
 
 // Create new folder to create resized pictures
 Dim newFolder As FolderItem = f.Parent.Child("ResizedPictures")
 newFolder.CreateAsFolder
 
 // Go through each original picture, resize it
 // and save it to the new folder
 For i As Integer = 1 To f.Count
   Dim newPicFile As FolderItem = newFolder.Child(f.Item(i).Name.Replace(".png", ".jpg"))
   Dim p As Picture = Picture.Open(f.Item(i))
   p.Save(newPicFile, Picture.SaveAsJPEG, Picture.QualityHigh)
 Next
 
 MsgBox("Pictures converted to high-quality JPEG.")

If you don’t count the comments, that’s just 10 lines. This code simply loops through the folder and opens each file as a Picture and then re-saves it to a new folder as a high-quality jpg. There’s no error handling, so the original folder better only contain pictures, but in my case I only needed to do this one time and I knew the folder only had pictures.

Running this code on the folder took a couple seconds and the folder size dropped to 25MB with no noticeable loss in the quality of the images (they were all pretty small) and also removed a few duplicates as well.

Making this Xojo app took me less time than I spent than searching Google and the App Store!

Watch the 2-minute video to see how easy it is:

iOS Tutorial: Shorten that URL!

$
0
0

In this Xojo tutorial we will see how simple it is to make an iOS App that shortens an entered URL using the public API of Bit.ly. We will use our own subclass inherited from Xojo.Net.HTTPSocket, and the Declare statement in order to use some functions and methods found on the native Cocoa Touch API. In fact, the use of Declare is mandatory because with the new Xojo Framewok we don’t yet have access to the EncodeURLComponent function available with the old framework. This one is a big help in substituting any ilegal character with his hexadecimal value for the final URL’s composition.

In addition, we will also use the Declare statement to access the iOS Clipboard so we can Copy the shortened URL in order to use it in any other app installed on the device.

Before you can start with this tutorial, make sure you have installed Xcode on your Mac. You’ll need the Simulator app, included with Xcode, in order to run any iOS app developed with Xojo (you can download and install Xcode for free from the Mac App Store). You will need also a General OAuth key to use when accessing the Bit.ly’s API exposed methods. To get your own key, you have to create an account on Bit.ly and follow the instructions found here.

Of course, to follow this tutorial you also need to install Xojo on your Mac! You can always download the most recent release of Xojo from here.

Designing the interface

Run the Xojo IDE and select the iOS App template from the Project Chooser. As result, the IDE will create a new project that already includes the barebones items in order to have a functional App. In fact, clicking the Run button will launch the app on the Xcode’s Simulator showing the default View… but nothing else.

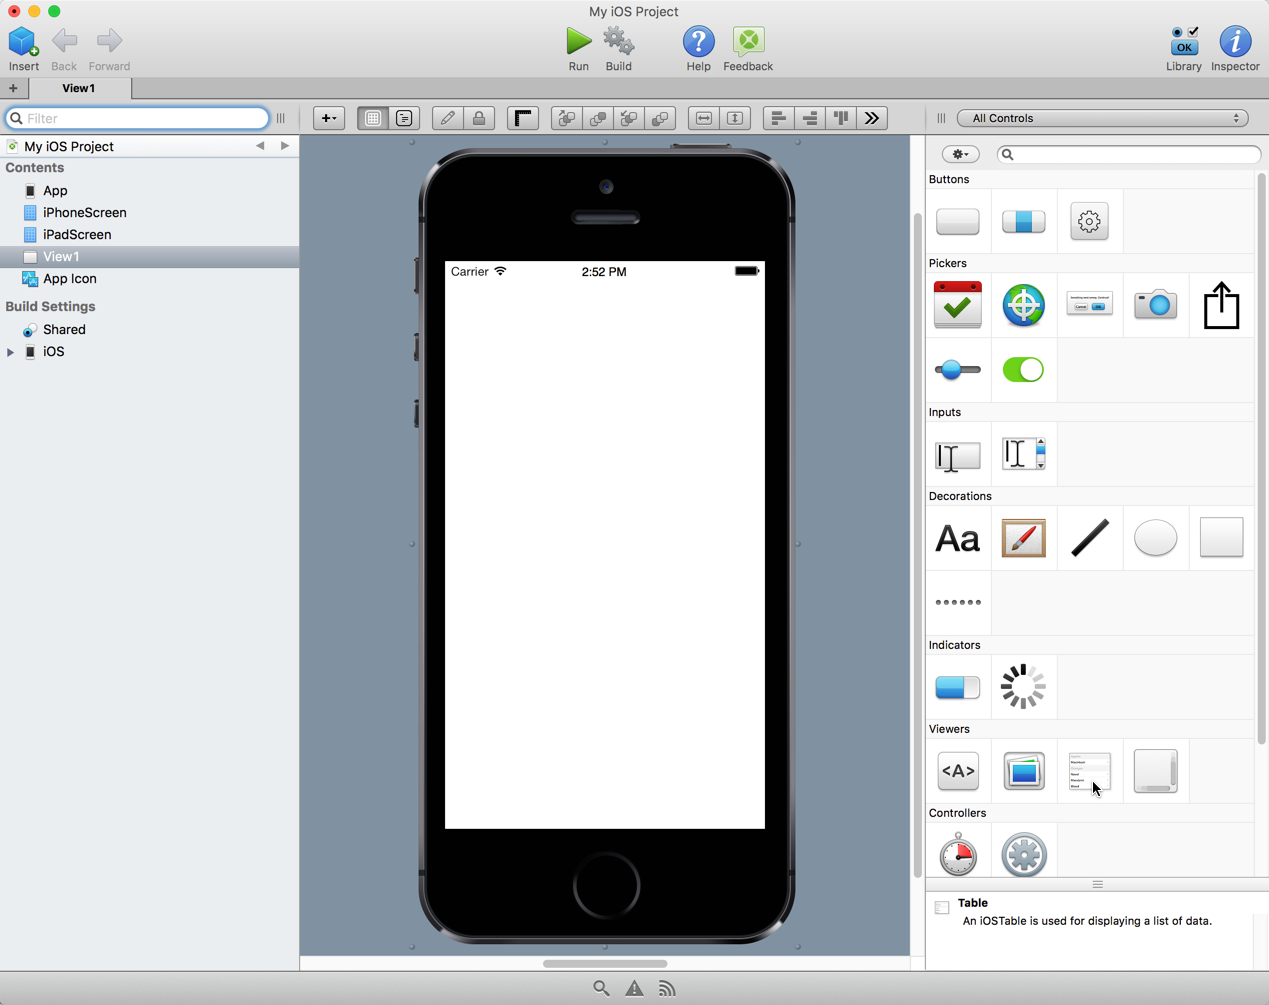
Choose the View1 item on the Navigator (the leftmost column on the IDE). This action will show the project default view on the Layout Editor. Click on the Library button and you will see all the objects or graphic components (UI elements) available for you to design the user interface for your iOS apps, as shown in this picture.

UI widgets for iOS Apps in Xojo

Drag the TextField control from the Library (found below the Inputs group) and drop it on the upper side of the view. Use the control handlers and the alignment guides to adjust his position and size, as shown in the following picture.

TextField control on iOS project

Select the just added TextField and click on the Inspector button in order to change some properties for the control. Here is the place where you can change some attributes like the control’s name (the one used to refer the control from code), the text color, keyboard type, text alignment, font size, etc. In this case, we will change these properties:

  • Name: txtURL
  • KeyboardType: URL
  • PlaceHolder: http://
  • Text: http://

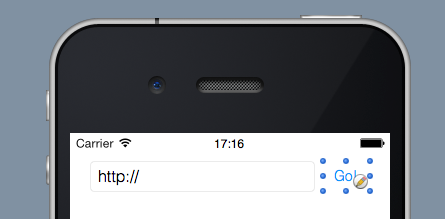
Once done, drag a Button from the Library and place it to the right of the TextField added before. Use the control handlers to adjust their size, and push on the icon with the picture of a pencil to change the label text to “Go!”, as shown in this picture.

Adding Button UI widget to iOS app in Xojo

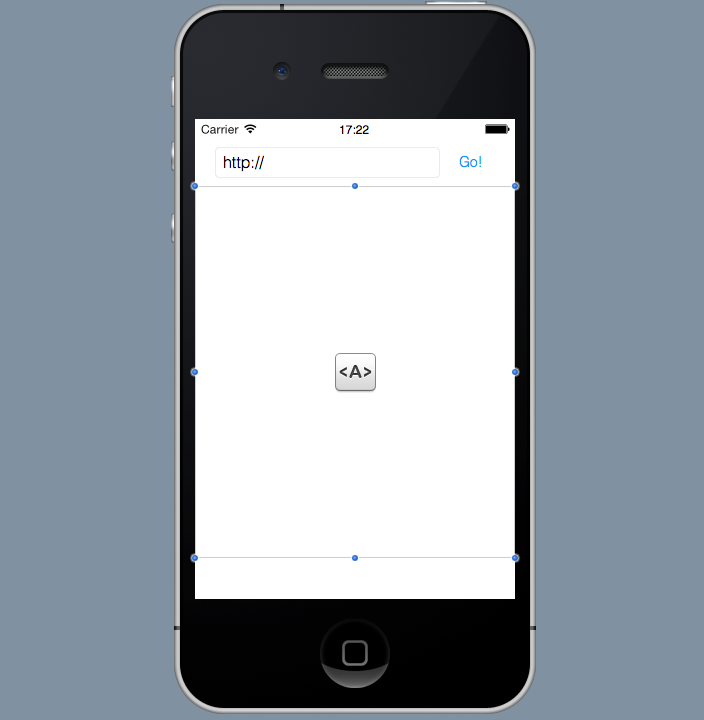
Besides shortening the typed URL, our iOS App will also show the corresponding webpage for that URL, something as easy as placing a HTMLViewer control instance from the Library below the TextField, as shown in the following picture.

Adding HTMLViewer to iOS App in Xojo

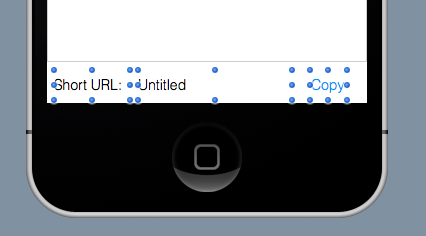
Finally, we will add a couple of Label controls below the HTMLViewer and a second Button control. The leftmost Label control will be a simple… well… label, but the second one will reflect the shortened URL. Place these controls from the Library, adjusting their sizes and positions as shown in this picture.

shortenedarea

Choose the central Label, the one used to show the shortened URL, and these properties, with the help of the Inspector:

  • Name: lblShortURL
  • Text: (vacío)

We finished our User Interface design! (tough?) In fact, you can again click the Run button from the Xojo IDE in order to run the app on the iOS Simulator. Once again, our default View will show up and, this time, you can play with the TextField and the Buttons… but nothing will happen yet. This is normal, we have to put the code on these controls we want to execute as a reaction to some kind of user interaction (event).

simulador

Return to the Xojo IDE, stop the app execution (click on the Stop button) and change your interface designer hat with the programmer one. Yeah, it’s time to write our own subclass in charge of communicate with the Bit.ly API!

Talking with Bit.ly’s API

It’s time to write our communication class with the Bit.ly’s API. That’s the class responsible of making the web request (via HTTP protocol) to the exposed method by the remote API…and to receive and work with the returned data. And, when it comes with web communications where we have to asynchronously deal with the received answer, we have to use our inherited subclass from Xojo.Net.HTTPSocket in order to add the specialized behaviour over the one found on the base class.

Choose Insert > Class to add a new Class to the project. Click on the just added class on the Navigator and change these attributes on the Inspector:

  • Name: BITLYSocket
  • Super: Xojo.Net.HTTPSocket

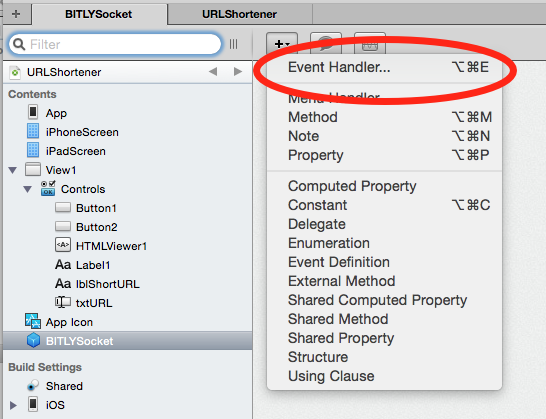
Click now the ‘+’ button on the IDE toolbar and choose the Event Handler menu option, as shown in this picture:

socketeventhandler

Select the PageReceived event on the resulting Window and click the Ok button. This action will add the event under the ‘Event Handlers’ hierarchy for our BITLYSocket class. In fact, this event will fire, executing the associated Xojo code, every time our socket receives data as result of our HTTP requests.

Type these lines of code in the Code Editor for the PageReceived event handler:

if HTTPStatus = 200 then
  dim data as Dictionary = xojo.data.ParseJSON( xojo.core.TextEncoding.UTF8.ConvertDataToText(content) )
  dim dataurl as Dictionary = data.Value( "data" )

  raiseevent URLShortened( dataurl.Value( "url" ) )
end if

As you can see, we check the returned Status Code to make sure that our request was properly processed (integer value 200). Next, we assign the result of parsing the returned data as a JSON structure to the ‘data’ variable, defined as a Dictionary type. (Xojo makes it really easy to interchange JSON and Dictionary structures/objects!)

The third line of code is the one in charge of creating the ‘dataurl’ Dictionary variable, and that will point to the Dictionary that really has the data we are interested in: the shortened URL. Finally, we raise a new event on our own class, passing the shortened url as Text.

You can find that the keys used in the Dictionary variables to retrieve the associated data, are the ones provided by Bit.ly in the response data, whose structure is documented and available on the Bit.ly’s API website.

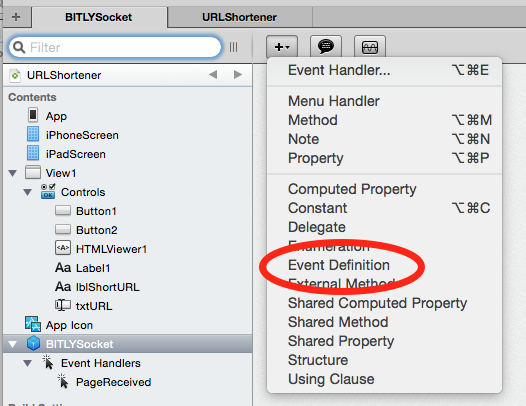
To define a new event for our class, make sure that the BITLYSocket item is selected on the Navigator and click again on the ‘+’ button on the IDE Toolbar. This time, choose the ‘Event Definition’ menu option, as shown in this picture:

socketeventdefinition

Unlike when we add a new Method to a class, the new event definition just allows us to write its signature; I mean, the event name and the parameters it will receive (if any) and/or the returned type (if proceed). After all, the code implementation for the event is a job of the Class consumer: the instances created from the class that decide to add the event.

As for our class, the added event will be responsible for passing the shortened URL to the class consumer (as we have seen in the previous code snippet), so the instance can decide what to do with the received data. In our app, this will be assigning the shortened URL (received as Text) to the central Label of our user interface.

Choose the added event and modify the following properties on the Inspector:

  • Event Name: URLShortened
  • Parameters: URL as Text

HTTP Request on iOS

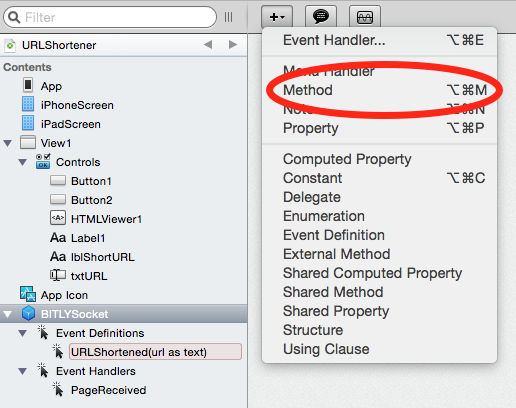
With the BITLYSocket selected on the Navigator, we are going to add a new Method. This will be the entry point for the class consumer to pass the URL to be shortened. For that, click again on the ‘+’ button from the IDE toolbar and choose the Method menu option.

socketmethod

Type the following values on the associateed Inspector:

  • Method Name: ShortURL
  • Parameters: URL as Text

And type the following code on the Code Editor for the just added method (ShortURL):

Declare Function CFURLCreateStringByAddingPercentEscapes lib "Foundation" _
  (allocator as Ptr, origString as CFStringRef, charactersToLeaveUnescaped as CFStringRef, _
  legalURLCharactersToBeEscaped as cfStringRef, encoding as uint32) as CFStringRef

dim encodedURL as Text = CFURLCreateStringByAddingPercentEscapes(nil,url,nil,nil,&h08000100)

dim compossedURL as Text = "https://api-ssl.bitly.com/v3/shorten?access_token=" _
  + kToken + "&longUrl=" + encodedURL

me.Send("GET", compossedURL)

Here is where we find the first Declare statement on our code! In fact this one is responsible for calling the CFURLCreateStringByAddingPercentEscapes function in order to substitute the illegal characters on a URL with their hexadecimal values. This is done with the second line of code, where we call the function, assigning the result to the ‘encodedURL’ variable.

The third line of code is where we compose the final URL in order to call the Bit.ly API’s method, putting the OAuth key, present here as the kToken constant (define your own class constant, and assign your OAuth key to it), and also adding the variable that points to the URL, with all their characters correctly escaped, to the end of the string.

The last line of code is where we make the request itself, using the Send method from the HTTPSocket base class. The first parameter is the method we want to use for the request (“GET” in this case), and the second parameter is the URL for the HTTP request.

We have finished our class definition!

Putting all to work together

Let’s add an instance of our BITLYSocket class to the app. For that, select the View1 item from the Navigator and, then, drag the BITLYSocket from the Navigator over the lower part of the Layout Editor. This action will show the Shelf, where you can drop the item in order to create a new instance named BITLYSocket1 (this one will be shown also under the View1 hierarchy on the Navigator).

Select the BITLYSocket1 instance under the Controls section of View1 on the Navigator and add a new Event Handler. From the resulting window, you’ll see the event defined by us. Choose this event (URLShortened) and click the Ok button in order to add it to the BITLYSocket1 instance.

bitlysocketevent

Type the following line of code in the associated Code Editor for the Event Handler:

lblShortURL.Text = url

This is the way we asign the received text (the shortened URL) to the Text property of the Label control instance.

But for this Event Handler to fire, we need to make the HTTP request in first place! Select the button Button1, add the Action Event Handler (the one that fires when the user pushes the button), and type the following code:

HTMLViewer1.LoadURL(txtURL.Text)
BITLYSocket1.shortURL(txtURL.Text)

Firstly, we load the web page for the URL typed on the TextField and, with the second line of code, we call the ShortURL method passing the URL as parameter. This line of code is what puts our communication socket to work!

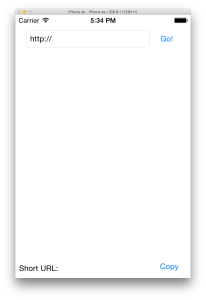
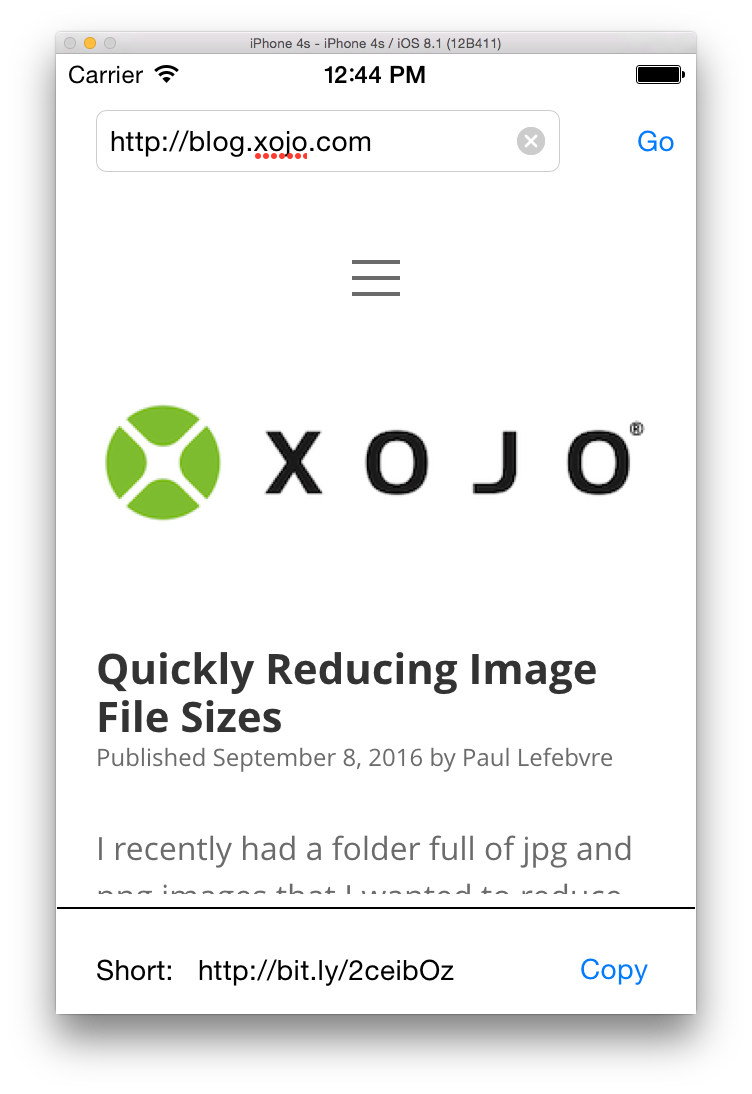
Run again the app on the iOS Simulator and type some URLs. You’ll see that now the app load the corresponding webpage and shows the shortened URL on the lower label of the interface!

finalworkingapp

While the HTTPSocket subclass will work under iOS 9 and later, this is not the case for the HTMLViewer when deploying the app under iOS 9 or the more recent iOS 10. The cause is that Apple enforces the use of HTTPS over HTTP when loading webpages or when using remote APIs (the bit.ly API uses HTTPS, so no problem with this part).

As for the load of webpages on the HTMLViewer, you simply have to implement the solution published by Paul Lefebvre in this post.

Basically, create a text file with the following content and drag the file over the Project Browser in order the Xojo IDE can merge it with the global Info.plist created during the app compilation:

<?xml version=”1.0″ encoding=”UTF-8″?>
<!DOCTYPE plist PUBLIC “-//Apple//DTD PLIST 1.0//EN” “http://www.apple.com/DTDs/PropertyList-1.0.dtd“>
<plist version=”1.0”>
<dict>
<key>NSAppTransportSecurity</key>
<dict>
<!– Include to allow all connections; avoid if possible –>
<key>NSAllowsArbitraryLoads</key>
<true/>
</dict>
</dict>
</plist>

Copying to the Clipboard

There is one last detail: If you tap on the Copy button… it simply doesn’t work. We need to put some code here too inside the Action Event Handler.

Choose the Button2 item on the Project Browser and add the Action Event Handler. Type the following lines of code to the associated Code Editor:

declare sub setValue lib "UIKit" selector "setValue:forPasteboardType:" _
  (obj_id as ptr, value as ptr, pasteboardType as CFStringRef)
declare function generalPasteboard lib "UIKIt" selector "generalPasteboard" (clsRef as ptr) as ptr
declare function NSClassFromString lib "Foundation" (clsName as cfstringref) as ptr
declare function stringWithString lib "Foundation" selector "stringWithString:" _
  (clsRef as ptr, str as cfstringref) as ptr

setValue(generalPasteboard(NSClassFromString("UIPasteboard")), _
  stringWithString(NSClassFromString("NSString"), lblShortURL.Text), "public.text")

This is the solution that allows our app to copy the shortened URL text to the iOS Clipboard. This snippet of code has been extracted from this thread on the Xojo forums, showing once more how great is the Xojo’s community!

Now, every time you tap the Copy button you’ll find the shortened URL on the Clipboard.

In short, in this tutorial we have seen how easy it is to make Web API requests from our Xojo iOS Apps, work with the returned data as JSON, and how powerful and useful the Declare statement is, in order to work directly with the methods and functions from the Cocoa Touch and Foundation frameworks from our Xojo code.

You can watch the video (in Spanish only) that talks you though this example.

Javier Rodri­guez has been the Xojo Spanish Evangelist since 2008, he’s also a Developer, Consultant and Trainer who has used Xojo since 1998. He is in charge of AprendeXojo.com and the developer behind the GuancheMOS plug-in for Xojo Developers and the Snippery app, among others.

*Read this post in Spanish
Mobile Development and Testing: iOS vs. Android

$
0
0

After being available for just a week now, iOS 10 has already been installed on  34% of iOS devices. It may end up outpacing the adoption of iOS 9 in the weeks following its release. The latest version of Android, on the other hand, isn’t even close. In fact, Android adoption of a new major release is quite slow. For example the latest version of Android, Nougat, was released on August 22nd of this year and is running on 0.1% of phones: one-tenth of one percent. The previous major version, Marshmallow, was released almost a year ago and is now at 18.7%, just slightly ahead of iOS 10’s first day adoption. Just a week after shipping, iOS 10 is now installed on almost twice the percentage of iOS devices compared to the year-old Marshmallow on Android devices.

This can have a significant impact on developers. The development and testing surface a developer must deal with is potentially as large as the number of OS versions they will support multiplied by the number of devices. On the iOS side, developers can often choose to only support the latest version of iOS because within a few months, most iOS users are running the latest version. There are really only 5 to a maximum of 8 iPhones and perhaps 4 iPads. That means 12 devices times a single OS version.

Many android phones
If a developer is going to support 80% of Android users, they have to go back to Android version 4 (Ice Cream Sandwich released in 2011) which means they have at least 4 but as many as 6 versions of Android to support multiplied by more than 50 devices that have been released since 2011. I’ve heard that it’s not unusual for Android developers to only test on the two latest Samsung phones. While that makes it easier on them, it virtually guarantees that the quality of software on Android is going to be reduced. How much would be difficult to quantify of course. Having said that, Google does not add new features to Android at anything like the rate at which Apple adds features to iOS. This is probably why developers can get away with a more limited development/testing surface on Android. Unfortunately, this leaves that judgement call up to the developer.

This could be made easier on developers if the Android market solidifies around a few devices. It could be argued that such solidification is already happening around Samsung. Despite Android having 80% of the smartphone market share, only one Android phone maker, Samsung, makes a profit. Every other Android phone maker loses money. Apple, on the other hand, is the only iOS device maker. Depending on the quarter, Apple makes between 75 and 90% of the profit in the smartphone industry with Samsung making the rest. That too is telling. It suggests that the Android market almost certainly will continue to solidify, almost certainly around Samsung.

As a maker of development tools, we at Xojo, Inc., support many platforms: macOS, Windows, Linux, the web, Raspberry Pi and iOS. We absolutely plan to support Android as well. We have not kept that a secret. We know there are many Xojo users that are anxious for us to make that available. We’ve been carefully studying the Android platform, from the market down to the APIs, to make sure that we can offer the best solution for developing cross-platform mobile applications. While it’s no fun to have to wait, sometimes waiting and entering a market at just the right moment, makes it easier to provide a quality development tool that will make it easier for developers to develop and test quality software. We are your partner in this and want to be the best partner we can be.

Xojo IDE Script Menu Shortcuts

$
0
0

In the Xojo IDE Scripts Menu there are some new shortcuts you may find helpful.

The items in the IDE Scripts menu under File > IDE Scripts now have shortcuts assigned for the first nine items (these are the scripts that you add to the Scripts folder). On OS X the shortcuts are Cmd + Option + digit and on Windows and Linux they are Ctrl + Alt + digit.

And for those scripts that do not get shortcuts assigned, selecting them from the menu will run them.

On OS X, if you hold down the Ctrl key + the above shortcut, then the script will be opened in the editor instead of run. On Windows and Linux holding the Shift key in addition to the above shortcut will accomplish this. These modifiers also works if you select the item from the menu. Hold the Ctrl key on OS X or Shift key on Windows and Linux the item will be opened in the editor instead of run.

Read more about IDE Scripting in the User Guide.

Happy IDE Scripting!

SQLite Full Text Search with FTS5

$
0
0

Xojo 2016 Release 3 adds support for SQLite’s latest full text search engine: FTS5.

FTS5 has several improvements over SQLite’s previous FTS3 and FTS4 engines (that are still available), but it does slightly break compatibility with FTS4/3. In particular you cannot include a column type in the CREATE VIRTUAL TABLE command and SELECT with MATCH must use the table name, not the column name.

These two features are also notable:

  • Sort results by relevance
  • Highlight results within text

Check out the updated Dev Center page to see some sample code or you can download an example project for Xojo 2016r3.

For information about all the FTS5 changes, refer to the official SQLite docs.


XojoTalk 029 – I Went to High School with the Apple File System Guy

About PostgreSQL Case Sensitivity

$
0
0

I’ve ran into PostgreSQL case sensitivity myself before and I’ve seen it come up on the forums, so I thought it might be a good thing to bring up here.

Sometimes you hear that PostgreSQL is case-insensitive, but it isn’t really. What it actually does is convert your SQL to lowercase by default. So take a look at this SQL:

SELECT FullName FROM Person

This gets converted to:

SELECT fullname FROM person

That is nice if you happen to like to write your queries with mixed casing.

But you’ll start to run into a problem if you’ve actually created the table with case-sensitive names, which happens when you use quotes around the names. For example, consider these SQL CREATE statements:

CREATE TABLE person (fullname VARCHAR(100), address VARCHAR(100))
CREATE TABLE Person (FullName VARCHAR(100), Address VARCHAR(100))
CREATE TABLE "Person" ("FullName" VARCHAR(100), "Address" VARCHAR(100))

In the first two examples, you get a table called “person” with two columns called “fullname” and “address”. That may not be obvious in the second example since the names are not lowercase, but remember that PostgreSQL converts your SQL to lowercase for you.

In the last example, the names are in quotes so their case is maintained. This means you’ll get a table called “Person” with two columns called “FullName” and “Address”. Now what happens if you try to run a query with a table called “Person”? Well, using SQL like this:

SELECT FullName FROM Person

you’ll get a syntax error:

ERROR: relation “person” does not exist
LINE 1: SELECT FullName FROM Person

This is because PostgreSQL is converting “Person” to “person”, but there is no table called “person”. It is actually called “Person”.

2016-09-23_09-38-33

To avoid this error you instead have to write the SQL with quotes like this:

SELECT "FullName" FROM "Person"

Obviously that can start to become a bit of a pain, so the moral of the story is don’t use quotes when creating tables or writing SQL queries so that everything is created as lowercase and things will work like you probably expect. You’ll especially want to pay attention to any tools you use to create SQL for you. If you use a tool’s UI to create a table and have a habit of typing in mixed case, the tool might generate SQL (or even the table itself) for you using quotes, which as you can see could mess you up later.

XDC 2016 Recap

$
0
0

This year’s Xojo Developer Conference was held at the distinctive Hotel Derek in downtown Houston, Texas.  We had attendees from 12 countries around the world, 36 of the best sessions ever, fun live music, great networking and delicious food!

The week started in earnest on the evening of Tuesday, October 4th as attendees joined us for early registration. After people registered and got their cool XDC shirts and Xojo water bottles, everyone migrated to the Revolve Bar at Hotel Derek for conversation and Xojo discussions.

reg-desk

The Keynote Starts

On Wednesday morning, the keynote started at 9 and Geoff opened with an overview of the conference and Xojo (see what we live tweeted). Highlights include:

  • XDC 2016 had attendees from 12 countries, with about 45% of the attendees from outside the US. About 25% were first-time XDC attendees.
  • There are now over 15,000 forum members, a 36% increase over last year, with over 276,000 posts.
  • And yes, XDC sessions were recorded again this year! They’ll be made available for free to all attendees and for sale to non-attendees later this year.

To finish the overview, Geoff talked a bit about Xojo Cloud security. Web servers are constantly scanned for vulnerabilities at an alarming rate. Xojo Cloud is no exception; it is scanned about every 10 seconds with zero known breaches to date. Xojo Cloud remains a safe, easy and secure way to host your Xojo web apps.

Xojo Design Awards

After the conference overview, Geoff announced the winners of the 2016 Xojo Design Awards, which honor excellence in software design. Awards were given in five different categories and Best Overall, which was awarded to EverWeb. EverWeb is a website builder that allows you to build a website with no code at all.

ever web main window

The winners are:


paul_smaller

Congratulations to the 2016 Xojo Design Award Winners! It is an inspiration to us all to see such powerful and amazing apps made with Xojo.

Xojo Recent Changes

Geoff next talked some of the changes to Xojo since XDC 2015. There were many, including:

  • 949 bugs fixed
  • 187 new features implemented
  • HiDPI support added for macOS, Windows and web
  • Raspberry Pi apps
  • 64-bit apps using the LLVM compiler
  • Addressed the top iOS requests

By the way, be sure to give Xojo 2016r3 a try as it dramatically decreases 64-bit compilation times.

Xojo Roadmap

Geoff then presented a roadmap for Xojo for the coming year. First up was Xojo 2016 Release 4, which is expected to ship in December. Notable new features include:

  • Better Xojo Cloud upload speeds
  • Windows HiDPI will be out of beta
  • The Windows IDE will be HiDPI
  • The Windows graphics framework is getting an update to switch to Direct2D and DirectWrite for smoother graphics and hardware acceleration

For early 2017, Xojo is expecting 64-bit to be out of beta, enabling things such as debugging, XojoScript, Windows manifest and other features.

Later in the year, we expect 64-bit to become the default build target. But don’t worry, 32-bit is not going away! We are also working on the 64-bit version of the IDE itself. The new Xojo framework will be expanded to have feature parity with the classic framework to make it easier for you to start using it in your projects. Lastly, we are also expecting the ability to write plugins for Xojo in Xojo (first announced at XDC 2015) to be made available.

Towards the end of the year, Xojo is working towards shipping an updated IDE with simplified project layout and management. We are also working on a new SDK Interoperability feature (Interops) that will make it much easier use your Xojo apps with standard app frameworks for iOS and macOS. And this new feature will be leveraged to provide an all-new Xojo project type: native Android mobile apps!

geoff-keynote

Geoff closed the keynote by talking about the history of Xojo, the team and how everyone can help spread the word about Xojo. Telling friends and coworkers about Xojo is a great way to help others enjoy its benefits and grow the Xojo community. Lastly, since Xojo turned 20 this year, Geoff talked a bit about what has changed in the development world since REALbasic 1.0 (the precursor to Xojo) was first released.

We also introduced limited-edition 20th Anniversary t-shirts, if you are interested email hello@xojo.com to order.

xdc-swag

General Sessions

Following the keynote, Susan Fennema did a talk on Managing Your Projects. Susan did a podcast with Paul back in August and this session had even more useful tips to help anyone become more productive at just about anything. Her Smarties giveaway proved quite smart, indeed!

sessionss

After Susan’s talk, Travis and Joe tag-teamed a presentation on the new Xojo framework and then it was time for lunch!

Sessions, So Many Sessions

After lunch the breakout sessions started. At this point there were always two sessions going on simultaneously and attendees often said they wanted to be able to attend both so it’s a great thing they were all recorded. There were sessions on a wide variety of topics, including iOS development, testing, databases, reporting, REST and so much more. With 36 sessions altogether, XDC truly is a “firehose of knowledge”!

Activities

Coming to XDC is not all about work and learning – you also get to have fun! This year’s evening activities started with a rockin’ night of live music with Skyrocket, a fabulous 70/80’s cover band. Our fearless CEO, Geoff Perlman, even joined the band on stage to play drums in a rousing cover of American Girl by Tom Petty.

color-drums

The next night everyone headed across the street to Grotto Ristorante for conversation, drink and a fabulous Italian dinner.

What Attendees Are Saying About XDC:

“This was my first XDC. Almost overwhelmed with information! I definitely enjoyed meeting everyone and I now have real faces (and accents) to attach to the forum posts.” – John Knight, Jr.


“2016 was my first time attending XDC, and it was amazing. I learned a lot, and met so many incredibly nice, interesting, and brilliant people. I want thank everyone for their kindness, generosity, and for the laughs. I feel like I’ve found my “tribe.” – Tim Dietrich


“I felt the same way at my first XDC 4 years ago, and still feel that way every year. It’s a great event, with amazing people, and I’m already looking forward to next year!” – John McKernon


“It was filled with useful information, of course, but more importantly, the people from Xojo and the other attendees were passionate about the platform and willing to dive in to help a newcomer learn.  I even had the opportunity to spend a couple hours with the CEO and some others and have a great discussion!  That says a lot about a twenty-year-old tech organization.  We will be converting our systems to Xojo-designed apps and I’ll be going again next year.” – Bill Kapeles


“I was another first timer at XDC. In my 30+ years of involvement in the software industry, this was one of the best development conferences I have attended. Professionalism and willingness to engage with new attendees was evident at every level. Wonderful experience!” – Karen Bintz


“The presentations covered such a wide range of topics. It was really cool to see all the incredibly different ways people use Xojo and to hear the depth of knowledge each one has in their particular areas. I learned a ton, and it was a privilege to present as well….. plus it was fun! It was particularly great to meet everyone in person. The whole event ran smoothly, the food was great, the entertainment was great.” – John Joyce


“This. This is why I go every year. Renewing friendships, meeting with clients (both old and prospective), learning new things, and talking Xojo non-stop makes for an awesome experience.” – Bob Keeney

Thanks!

The Xojo Team wants to thank all the attendees of XDC 2016. We could not do XDC without you. And a special thanks to all the presenters helping to make XDC so valuable by providing wonderful, varied content. We can’t wait to see you next time!

img_0503

From left to right: William Yu, Paul Lefebvre, Stéphane Pinel, Alyssa Foley, Greg O’Lone, Dana Brown, Norman Palardy (seated), Travis Hill (standing), Geoff Perlman, Joe Ranieri, Robin Lauryssen-Mitchell, and Jason Parsley

Xojo Draw in the App Store

$
0
0

Want to see how easy it is to make an iOS app with Xojo? Check out Xojo Draw in the App Store. Released last week at the start of XDC 2016, Xojo Draw is an enhanced version of the Xojo Doodle sample project that is included with Xojo. Working on both iPhone and iPad, Xojo Draw lets you draw with touch and save your creations to the camera roll or send to other apps.

2016-10-12_10-09-13

In addition, to help you learn how you can create your own iOS apps, the full source code for Xojo Draw is on GitHub (click the Clone or Download button to get it)! Grab the free version of Xojo and the Xojo Draw source code to see for yourself how you can quickly start creating your own iOS apps.

And stay tuned for more Xojo-made apps to appear in the App Store, along with full source code to help you get coding with Xojo iOS!

Don’t Get Lost…With iOSLocation

$
0
0

With Xojo 2016r2 and later your iOS apps can access and use a new feature: iOS Location. This is a BIG feature to help you determine where in the world the device running your app is located and so you can react to its location. And you know what is even better? Implementing this feature is no-brainer.

In order to see how easy it is to implement this feature, let’s make a simple iOS app from scratch. To start, you’ll need to create a new iOS Project from the Project Chooser on the Xojo IDE, and also to install the free Xcode IDE and associated utilities from Apple. This is the way to run the app on the iOS Simulator.

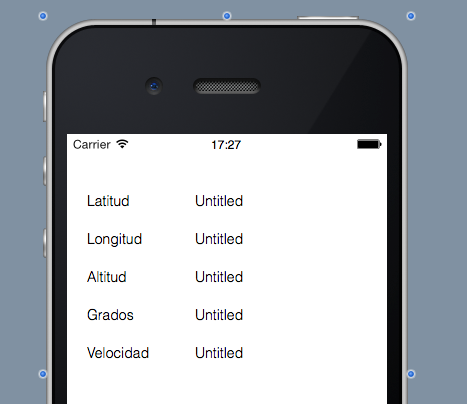
Once you have created the new iOS project, and after selecting the default View included with the Project template, we will add some Labels: to the left we will type a descriptive text about the associated localization data (Latitude, Altitude, Speed…); and the Labels on the right side will be the ones we will refer from code to show the data itself. The resulting View layout should be something like this screenshot:

diseno-de-aplicacion-ios-de-ejemplo-con-ioslocation

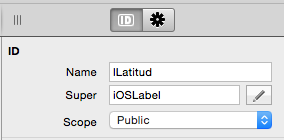
Access the Inspector for each Label in charge to display the geolocation data, and type a descriptive Name for the control, so it will be easier to refer to it from code.

captura-de-pantalla-2016-07-19-a-las-17-29-59

iOSLocation Control

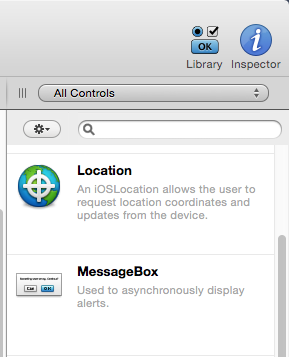
Obviously you’ll want to do better layout designs for your own projects. In fact, you don’t have to display the geolocation data at all! What you need to do is drag and drop the Location Control from the Library over the Layout Editor.

control-ioslocation-en-el-panel-libreria-del-ide-de-xojo

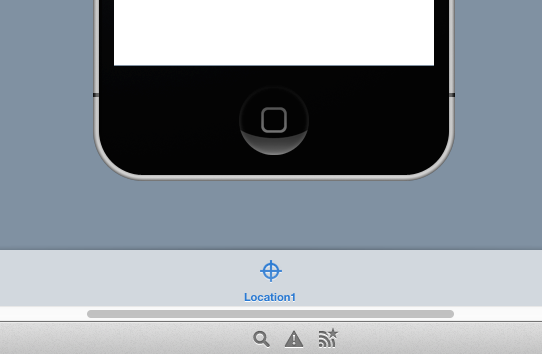
Once done, you’ll see the new Location Control instance displayed in the Tray on the lower part of the Layout Design Editor.

instancia-de-ioslocation-anadida-a-la-bandeja-del-editor-de-vistas

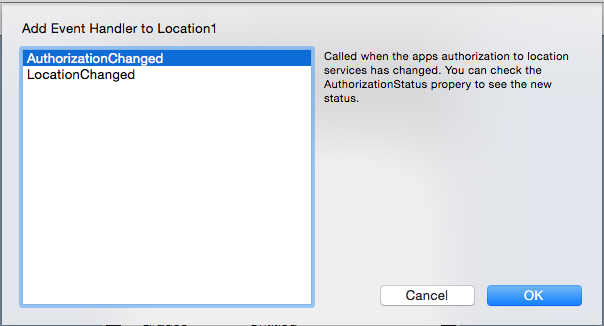
Select that new Location instance on the Navigator and access the Contextual Menu to choose the “Add to controlName Event Handler…” option. In the resulting window, choose the LocationChanged and AuthorizationChanged events, clicking the OK button to confirm the action.

seleccion-de-manejadores-de-eventos-para-ioslocation

As you’ve probably already guessed, the LocationChanged functionality is very obvious: this is the event fired every time the Location instance needs to notify the app about changes in the geolocation values. In fact, when examining this Event signature we find all the arguments variables in charge to store the values about latitude, longitude, accuracy, altitude, altitude accuracy, the degrees relative to true north, and the speed given in meters per second. In brief, all the information you may need to make complex apps based on the geolocation of the iOS Device.

Choose the LocationChanged event and write the following code, making sure you change the Labels names to those defined by you on your own project:

lAltitud.Text = altitude.ToText
lLatitud.Text = latitude.ToText
lLongitud.Text = longitude.ToText
lGrados.Text = course.ToText

dim velocidad as double = (speed / 1000) * 3600

lVelocidad.Text = velocidad.ToText + " Km/h"

Activating iOSLocation

If you try to execute the iOS app in the Simulator you will find that there are no updates about geolocation at all, even if you change the options available under the Debug > Location menu. This is because iOS apps that want to use the Location services have to ask for permission (you know, this is related with the user privacy; something Apple takes seriously). So, let’s see how can deal with that in this project.

Let’s start writing the code for the second Event we added on the previous step: AuthorizationChanged. This is the Event fired on the iOSLocation instance every time there is a change on the associated authorization state.

Choose the AuthorizationChanged event in order to access his associated Code Editor, and write this line of code:

if me.AuthorizationState = iOSLocation.AuthorizationStates.AuthorizedWhenInUse then me.Enabled = true

When reading the Xojo Documentation you will see how AuthorizationStates is an Enum that also includes Restricted, Denied or AuthorizedAlways among other values. As you can see, if the available value is AuthorizedWhenInUse then the Location instance will be active, starting to receive and forward the changes about the geolocation values.

The only thing left is the code to ask for the authorization itself, firing the previous event in response to the selection made by the app user. This is something we are going to put in the default View Open Event. Once added, choose the Open event and write the following code:

Location1.Accuracy = iOSLocation.Accuracies.Best
if Location1.AuthorizationState = iOSLocation.AuthorizationStates.AuthorizedWhenInUse then
  Location1.Enabled = True
else
  location1.RequestInUseAuthorization
end if

The first line establishes the frequency for geolocation notifications frequency. Once again, this is an Enum whose values are in the Xojo documentation. Generally speaking, the ‘Best’ option has the one that offers a good balance between geolocation accuracy and battery consumption. In fact, this is something you have to take care of when designing any iOS apps that uses Location services!

In the ‘If… Then… Else’ block we check first if our app already has the needed authorization. If this is the case, we simply proceed to activate our Location instance to start receiving the data about geolocation changes.

But if this is the first time our app asks for permission (or if it was denied previously), then our app will execute the second block of code (after the else statement), calling the RequestInUseAuthorization method in charge of showing the Authorization Dialog to the user.

Do I have Authorization, .plist?

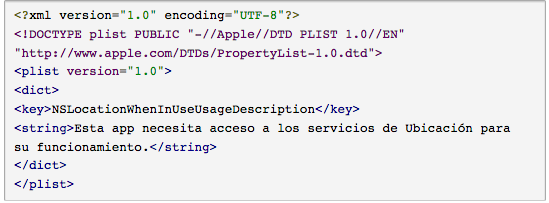
We are one final detail away! A ‘.plist’ file containing the message to show by the Authorization Dialog, and that has to be associated with the key NSLocationWhenInUseUsageDescription. Use the following xml data, save it as a text file using the ‘.plist’ file extension and import it to the Xojo Project.

captura-de-pantalla-2016-10-10-a-las-10-50-45

Ready! Run the app in the iOS Simulator —or on a iOS device— and start to see the updates about the geolocation data. For example, if you are using the iOS Simulator, choose the Debug > Location > City Bicycle Ride option. And that is how easy is to add this feature to your iOS projects!

You can watch the video (in Spanish only) that talks you though this example.

Javier Rodri­guez has been the Xojo Spanish Evangelist since 2008, he’s also a Developer, Consultant and Trainer who has used Xojo since 1998. He is in charge of AprendeXojo.com and the developer behind the GuancheMOS plug-in for Xojo Developers and the Snippery app, among others.

*Read this post in Spanish

XojoTalk 030 – We Like Our Customers

Guest Post: See You At The Next MBS Xojo Conference

$
0
0

Guest Post by Christian Schmitz of Monkeybread Software, a Xojo developer from Germany. 18 years ago various consulting projects brought Christian to plugin development for Xojo. Digging through various libraries, OS features and compiler techniques, he built a huge plugin toolbox for use in his own projects and to license to others. Christian has (co)hosted ten conferences over the years and you can join the next one in Berlin.

Do you like to meet other Xojo users and go to conferences? Well, you are in luck! In 2017 there is a conference being organized by Monkeybread Software. Xojo developers from all over the world will meet the first week in May 2017 in metropolitan Berlin, Germany. In the center of western Berlin at the Ellington hotel, next to the nearby Kurfürstendamm, the Zoo and KaDeWe. We selected this central location in Europe for easy traveling for developers from east and west.

Beside the two conference days, we have an accompanying social programme with dinner events and an optional two training days. For the evenings we have casual get-togethers in the hotel bar and beer garden.

screen-shot-2016-11-01-at-2-47-00-pm

We are happy to have Xojo engineers join our conference. Xojo’s Stéphane Pinel from France will be there to talk about Xojo. Jens Boschulte, our PDF specialist and creator of the DynaPDF library will be available for questions. And of course we have a few other well known Xojo developers coming.

All Xojo conferences are a great places to learn about Xojo, see what is new for Xojo IDE itself as well as for third-party products. You can meet other developers and get a lot of new contacts.  Ask questions and discuss how you solve problems, learn from others and discover new techniques. Feel free to present yourself and your projects, so others can give you tips and learn from you. As you depend on Xojo for your business, please use this to talk to the Xojo people about what you need from them in the future.

screen-shot-2016-11-01-at-2-47-07-pm

The schedule:

May 3rd: Xojo Training in English

May 4th: Conference, first day with dinner event

May 5th: Conference, second day

May 6th: Xojo Training in German

In the evenings we meet for dinner so you can meet other attendees. Registration is available and we already have people coming from six countries.

The early bird offer available till 4th December is just 299 Euro plus VAT. Attending the conference costs regularly 499 Euro plus VAT, including food and beverage in the Ellington Hotel as well as an accompanying social program.

Sessions are to be held in English. Our conference is conceived as a networking event for the Xojo community. The conference is an ideal opportunity for sharing your thoughts and your own development experience with fellow users and developers. If you like to give a presentation, please contact us as soon as possible. Speakers receive discounted tickets.

Registration and more Information.

Training days in German and English.

For any questions, please contact Monkeybread Software directly.


Guest Blog Post: Iconographer from Ohanaware

$
0
0

Sam Rowlands has been developing Xojo apps since 1997. He and his wife, Joy Sha, make up Ohanaware and they have been building award winning apps since 2008, notably Funtastic Photos, HDRtist and Shine. Sam is an active Xojo developer and he also offers App Wrapper, which simplifies the process of preparing applications for submission to the Mac App Store and deploying on web sites, in the Xojo Third Party Store.

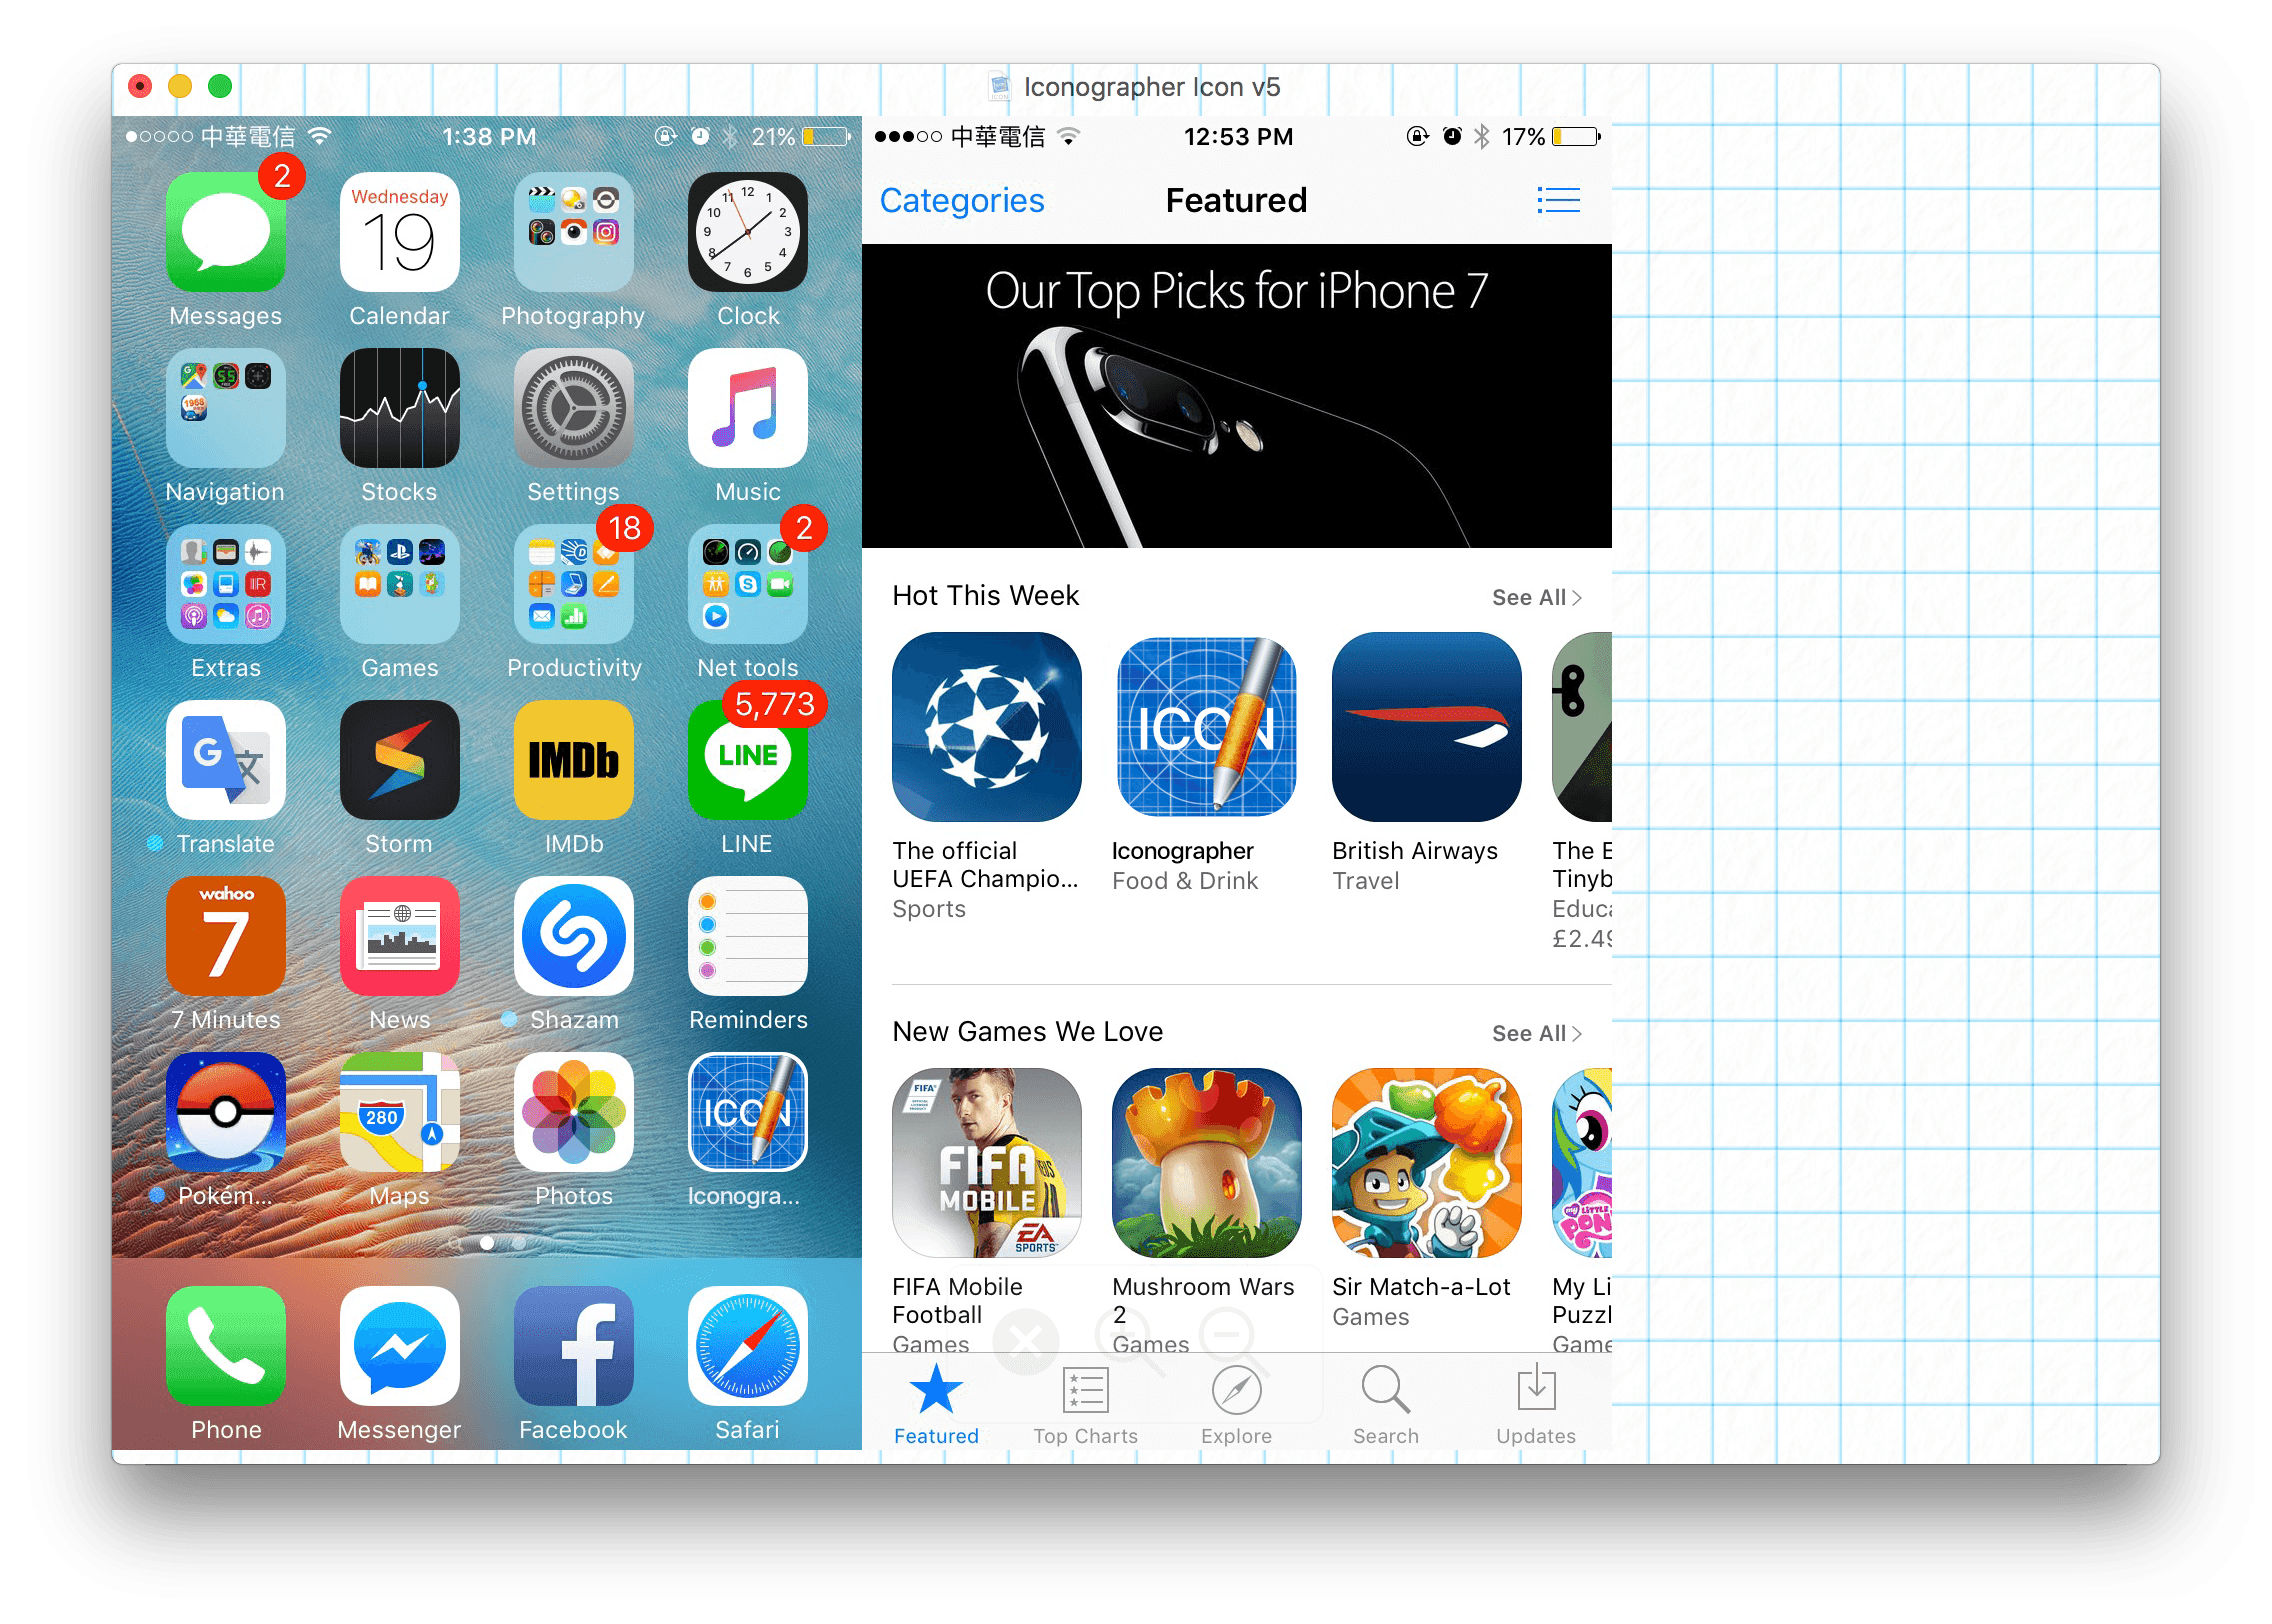
I’d like to introduce you to Ohanaware’s latest Made With Xojo application we’ve created for us Xojo developers. It’s called “Iconographer” and it is designed to simplify the process of creating stunning and platform-consistent icons for Mac, Windows & iOS.

iconspread

The idea behind Iconographer, is to be able to take the same set of elements and produce app icons, document icons, folder icons, disk icons and web icons that are all consistent with their intended target, while retaining the application identity.

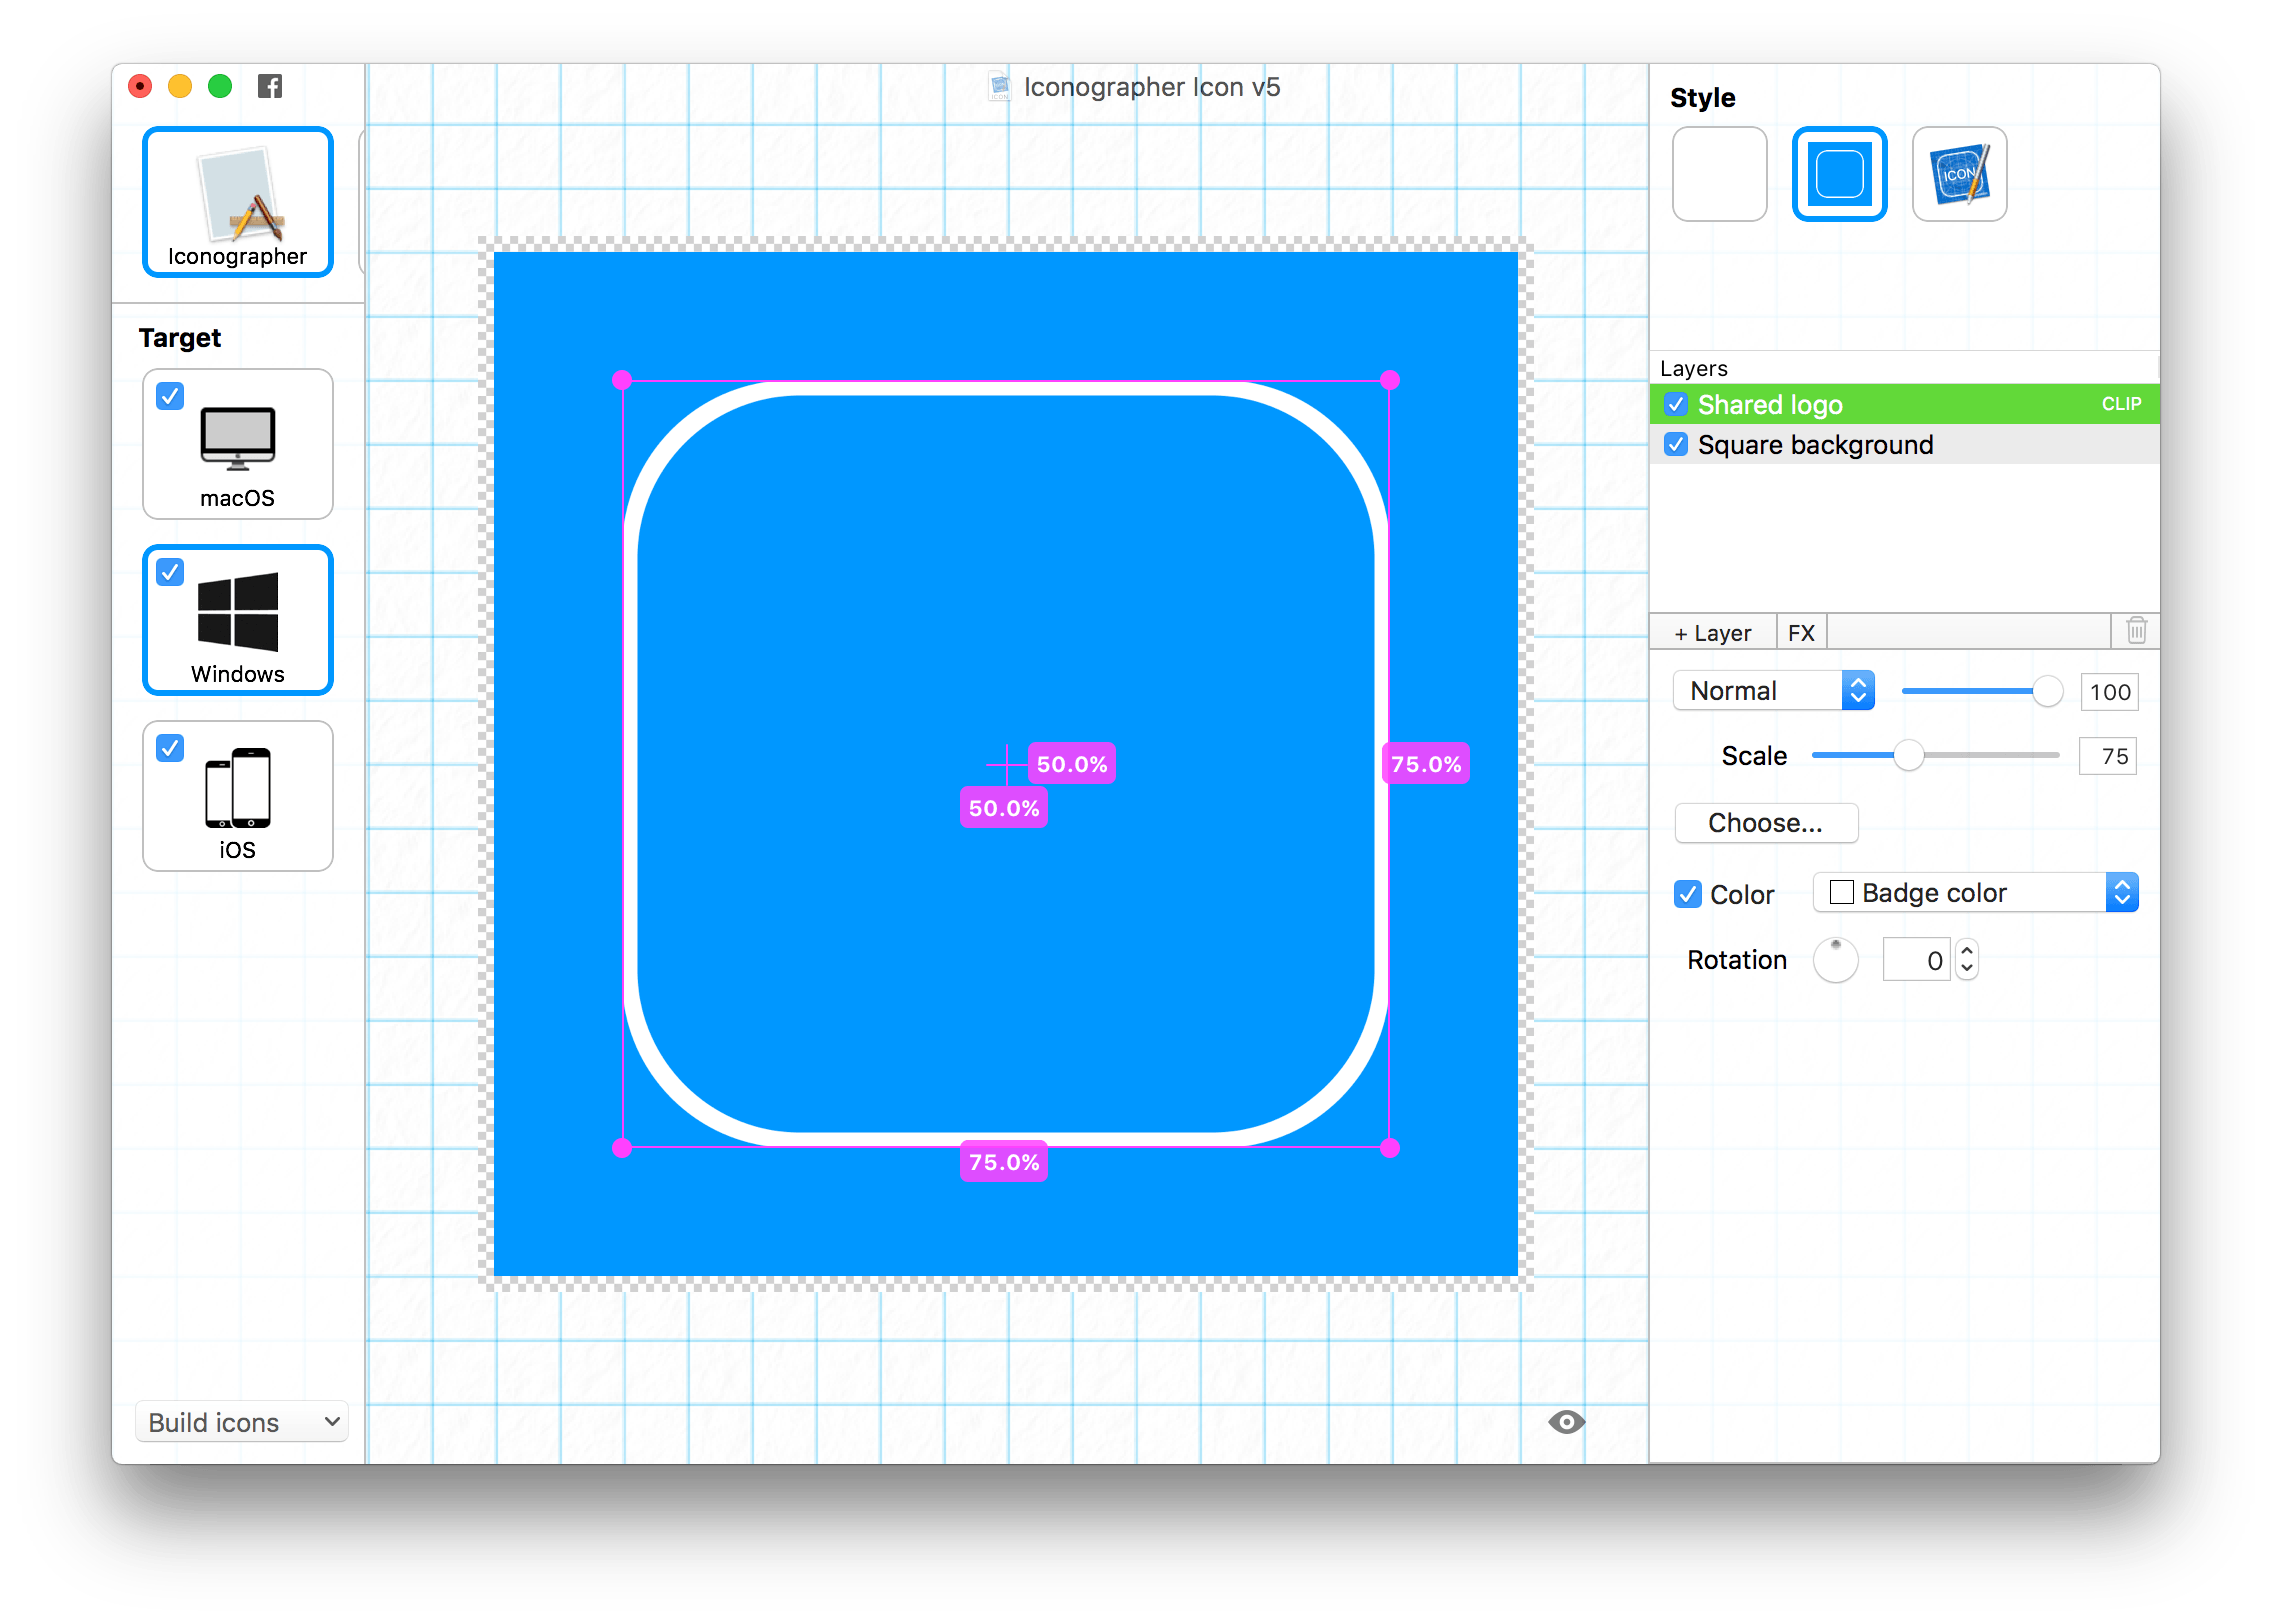
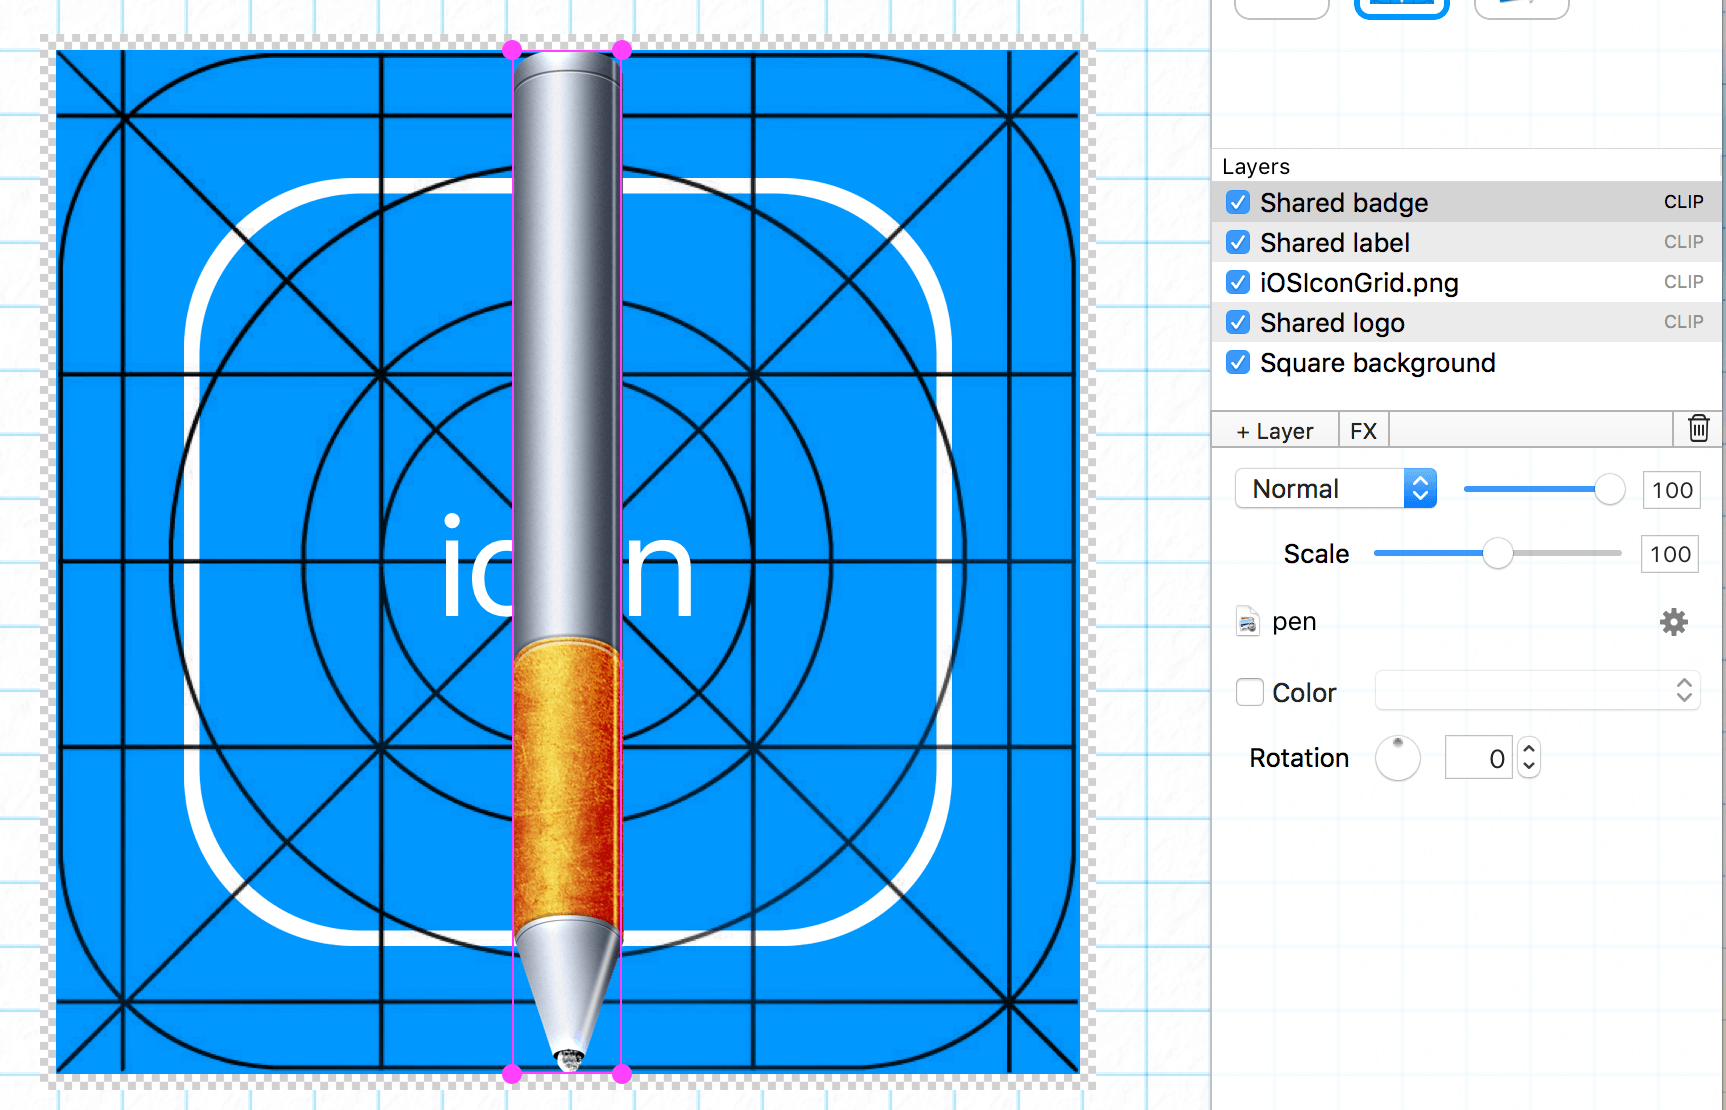
macosiconandeditorHere we have our Iconographer icon in the Iconographer editor, a quick look at the interface and you’ll notice that we have an “Icon” selector, a “Target” selector, a “Style” selector, Layers and then layer properties.

I’m not going to show you how I made the Iconographer icon, instead I’ll demonstrate how to take this fine work of art and create all the other icons that we may need.

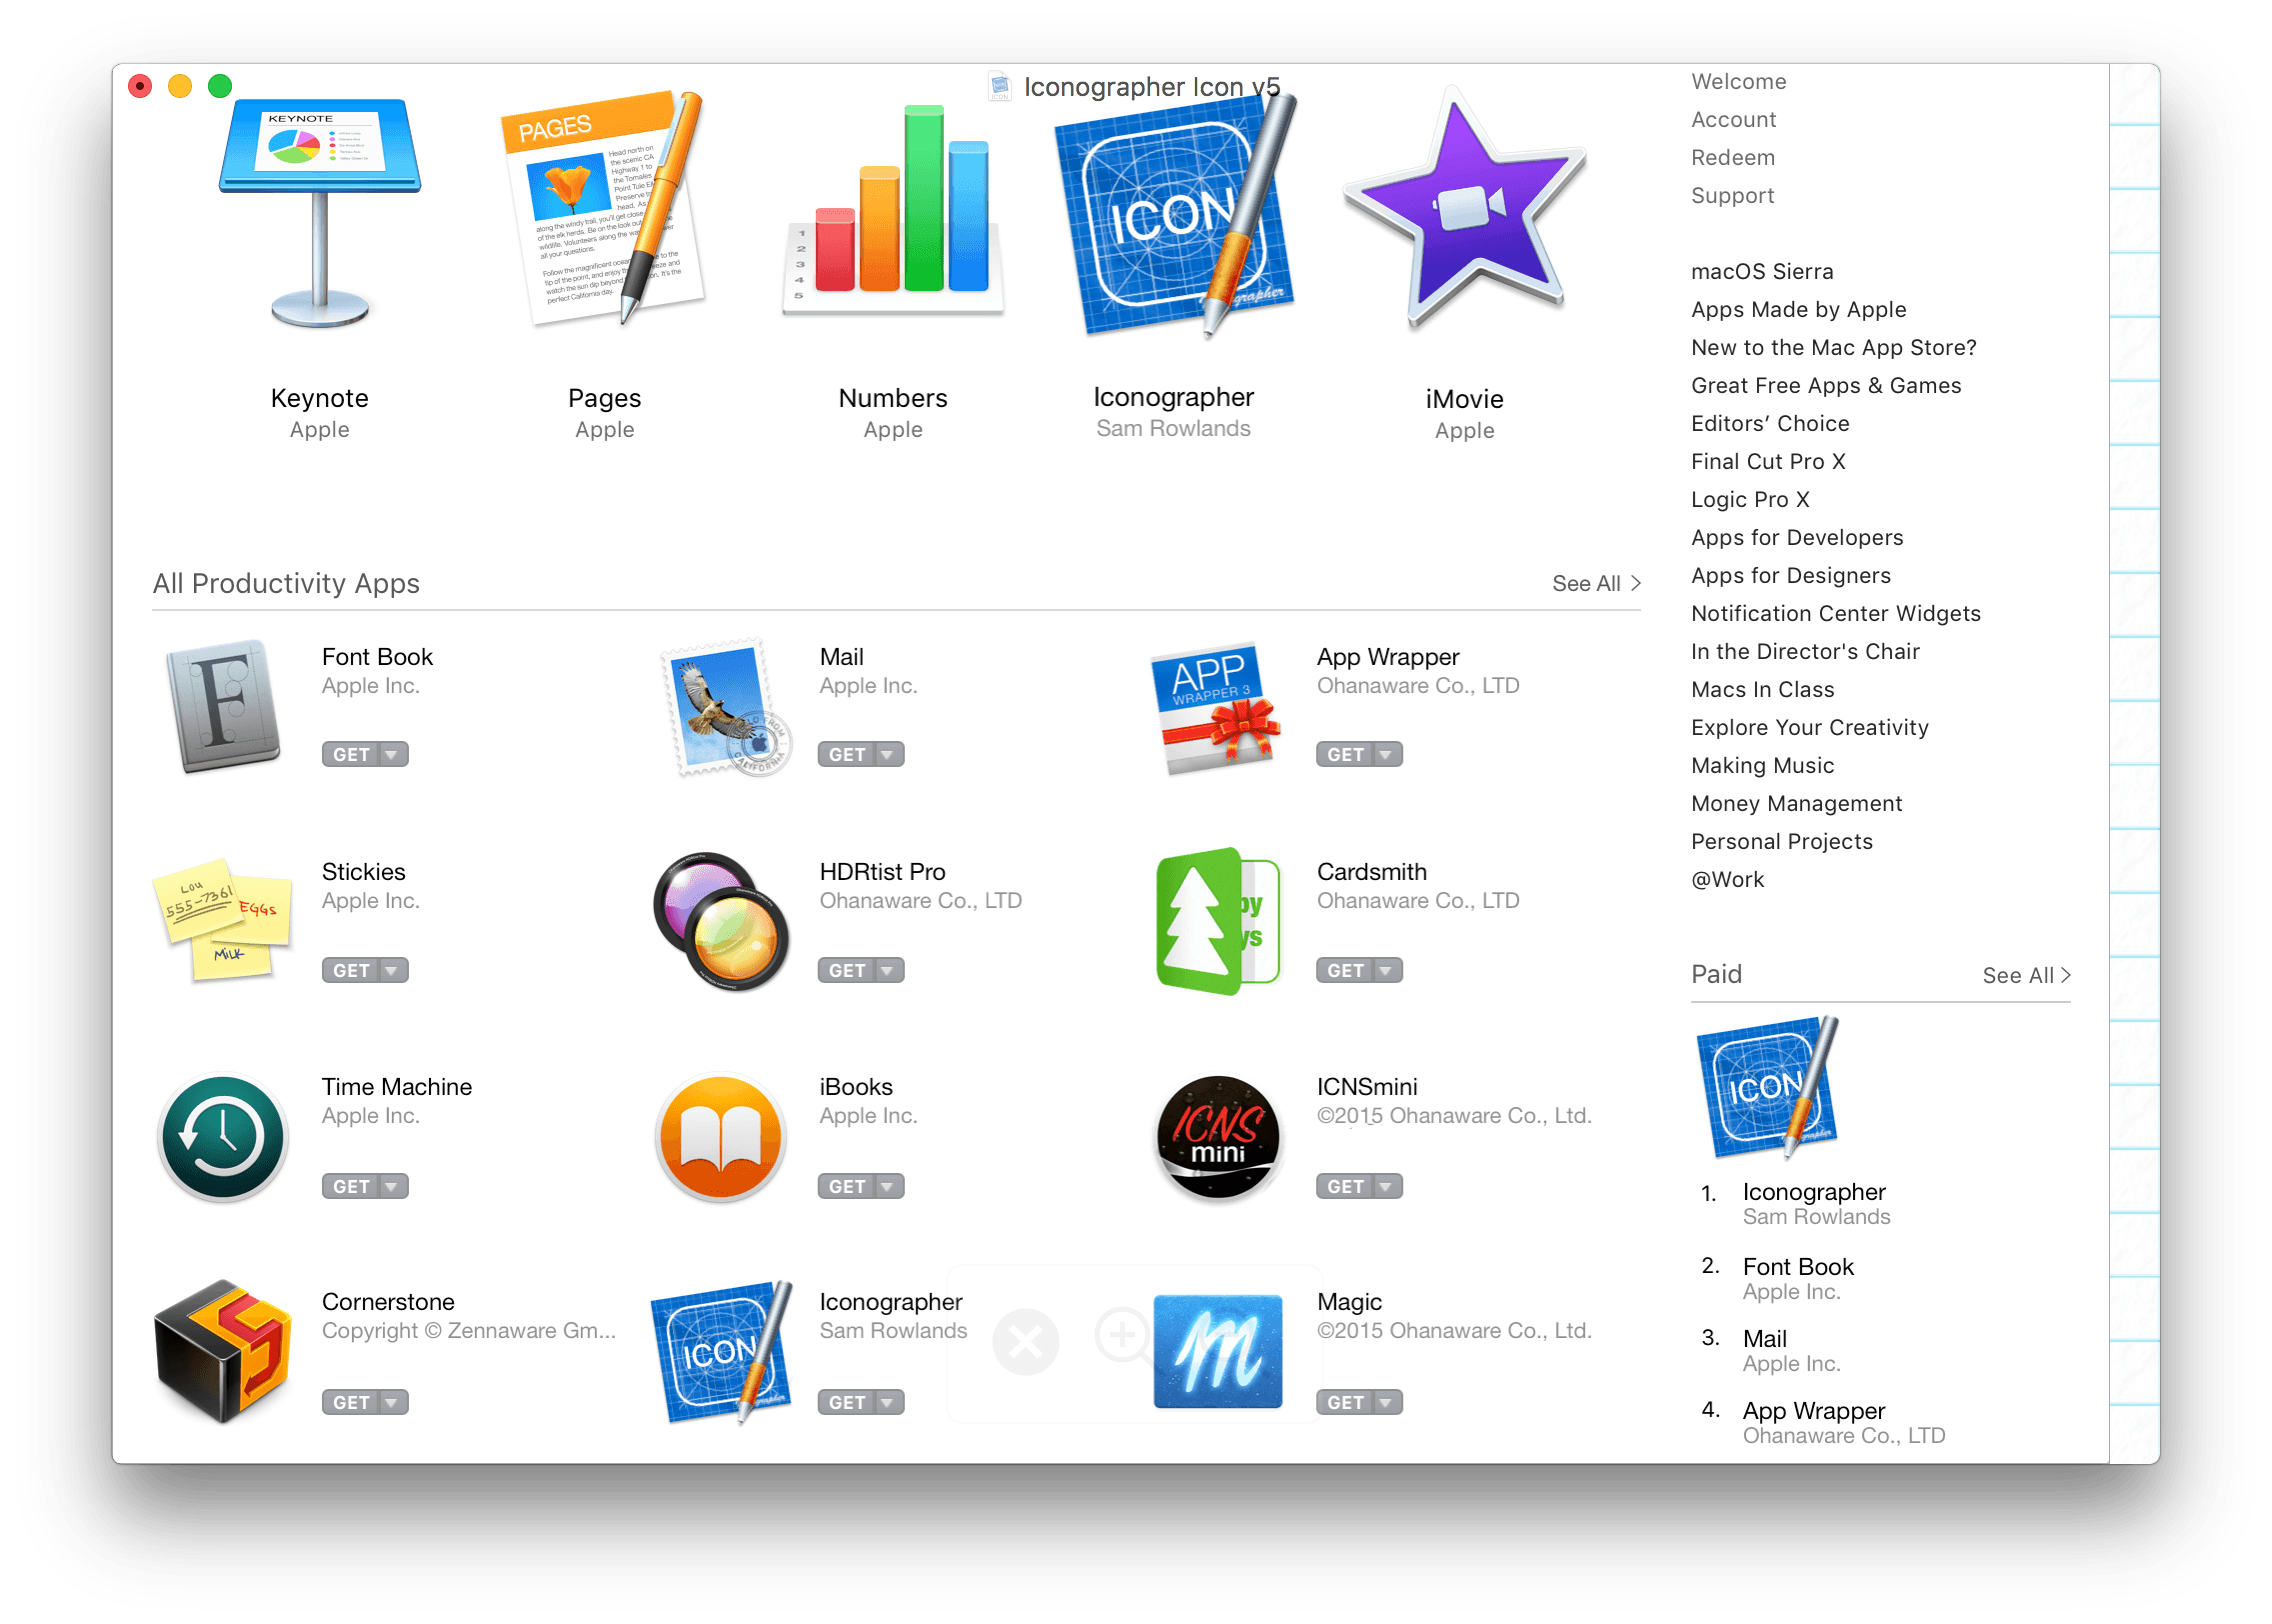
Before we begin, I just want to see what the icon will look like in the Mac App Store, to do that, I’ll select “Mac App Store” from the “Preview Icon in” menu, from the “Preview” button in the bottom right hand corner of the editor. Note: The preview pulls the other application icons from your applications folder, so this also doubles as a way of comparing with existing apps.

macappstorepreviewClicking on the “Windows” target will change the editor to the Windows application icon. From here I chose the “Windows Tile” style, but it doesn’t look anything that I might like. Note: part of this is how I chose to build the Iconographer icon.

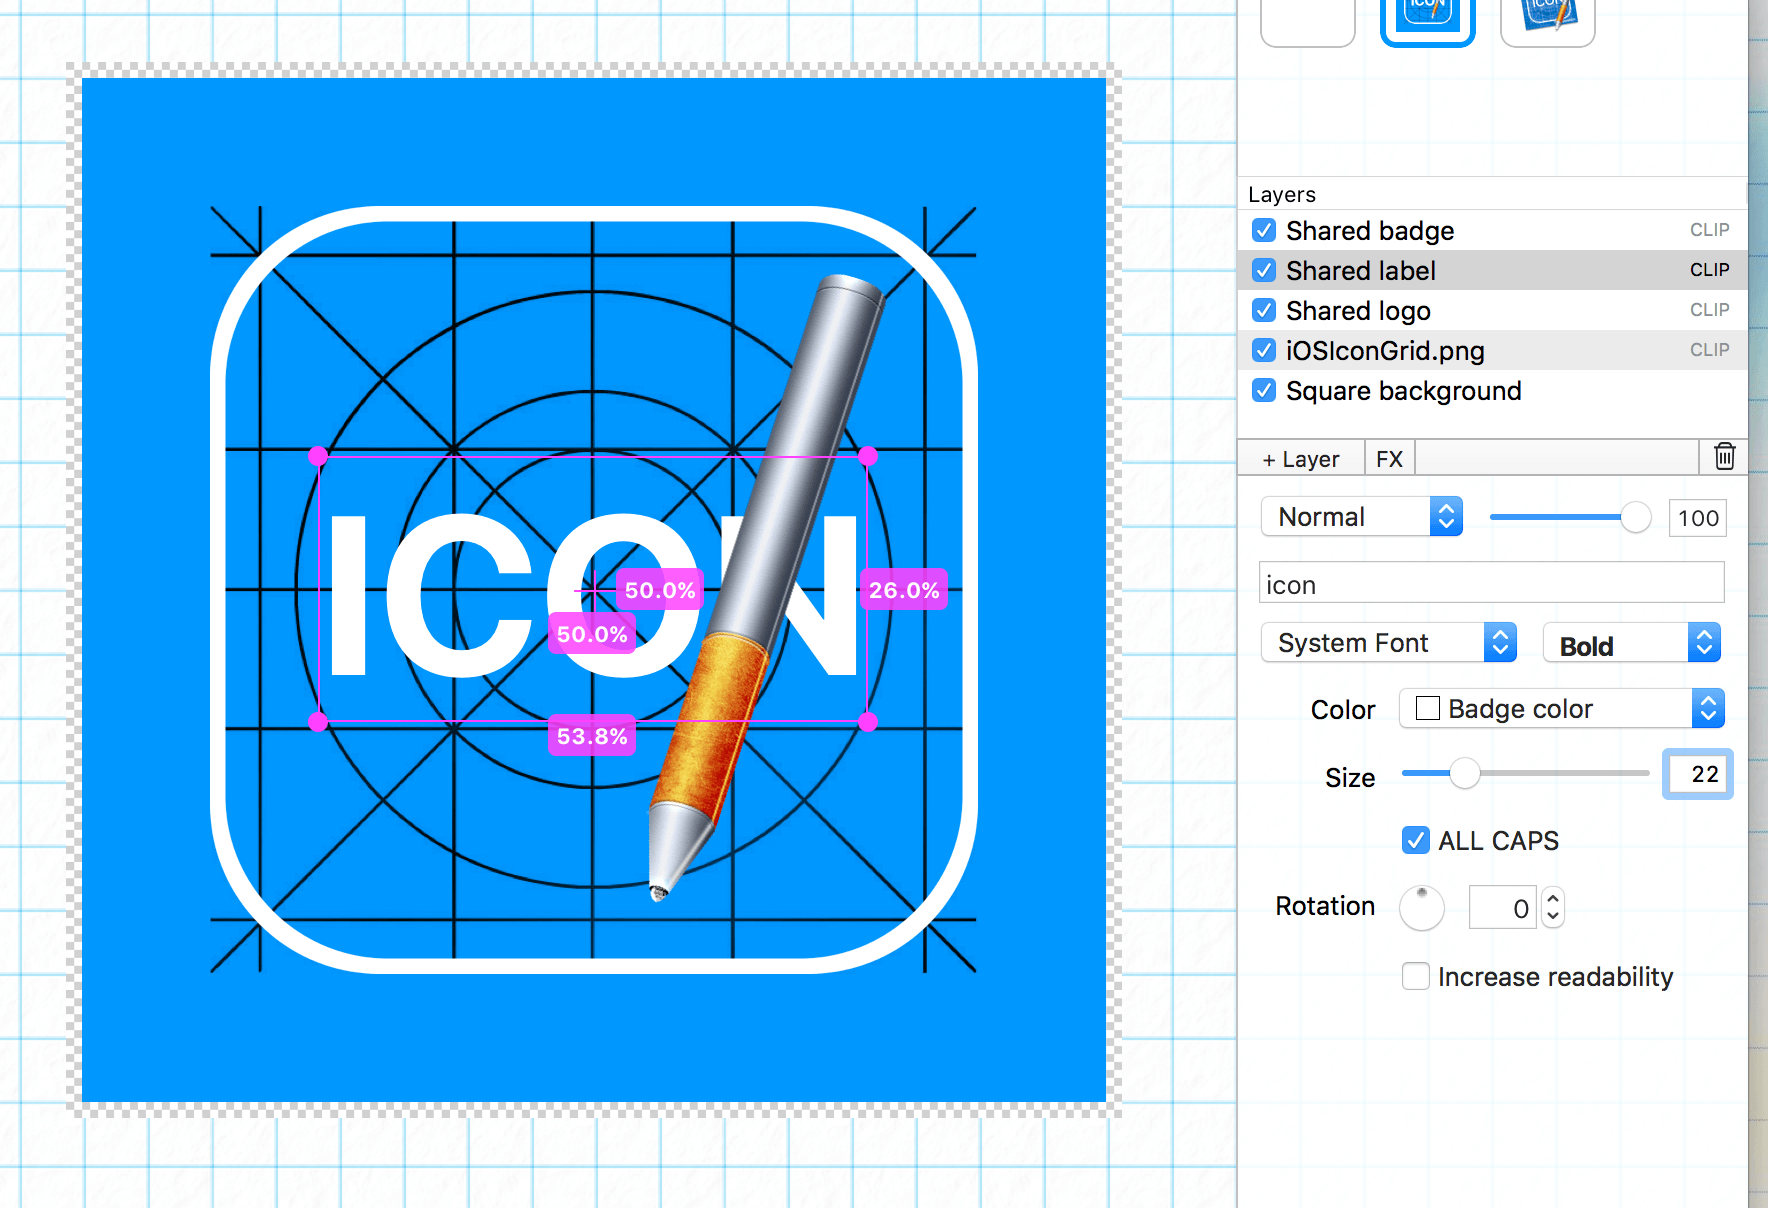
windowsblanktileThere’s only two layers for this icon, I need to import the rest. Simply clicking on the “+ Layer” button, I can select and add in the shared graphics and the shared label.

windowslayers1

Now you can see that the layers list has more layers and all the elements are loaded, but it looks like a mess. I’ll start by re-arranging the layers to get a more pleasing layout.

windowslayers2

That’s a bit more like it, now the layout looks more pleasing, I’ve tweaked the font & size of
the text, also enabled “All Caps” so it automatically displays in capital letters. Still one problem…

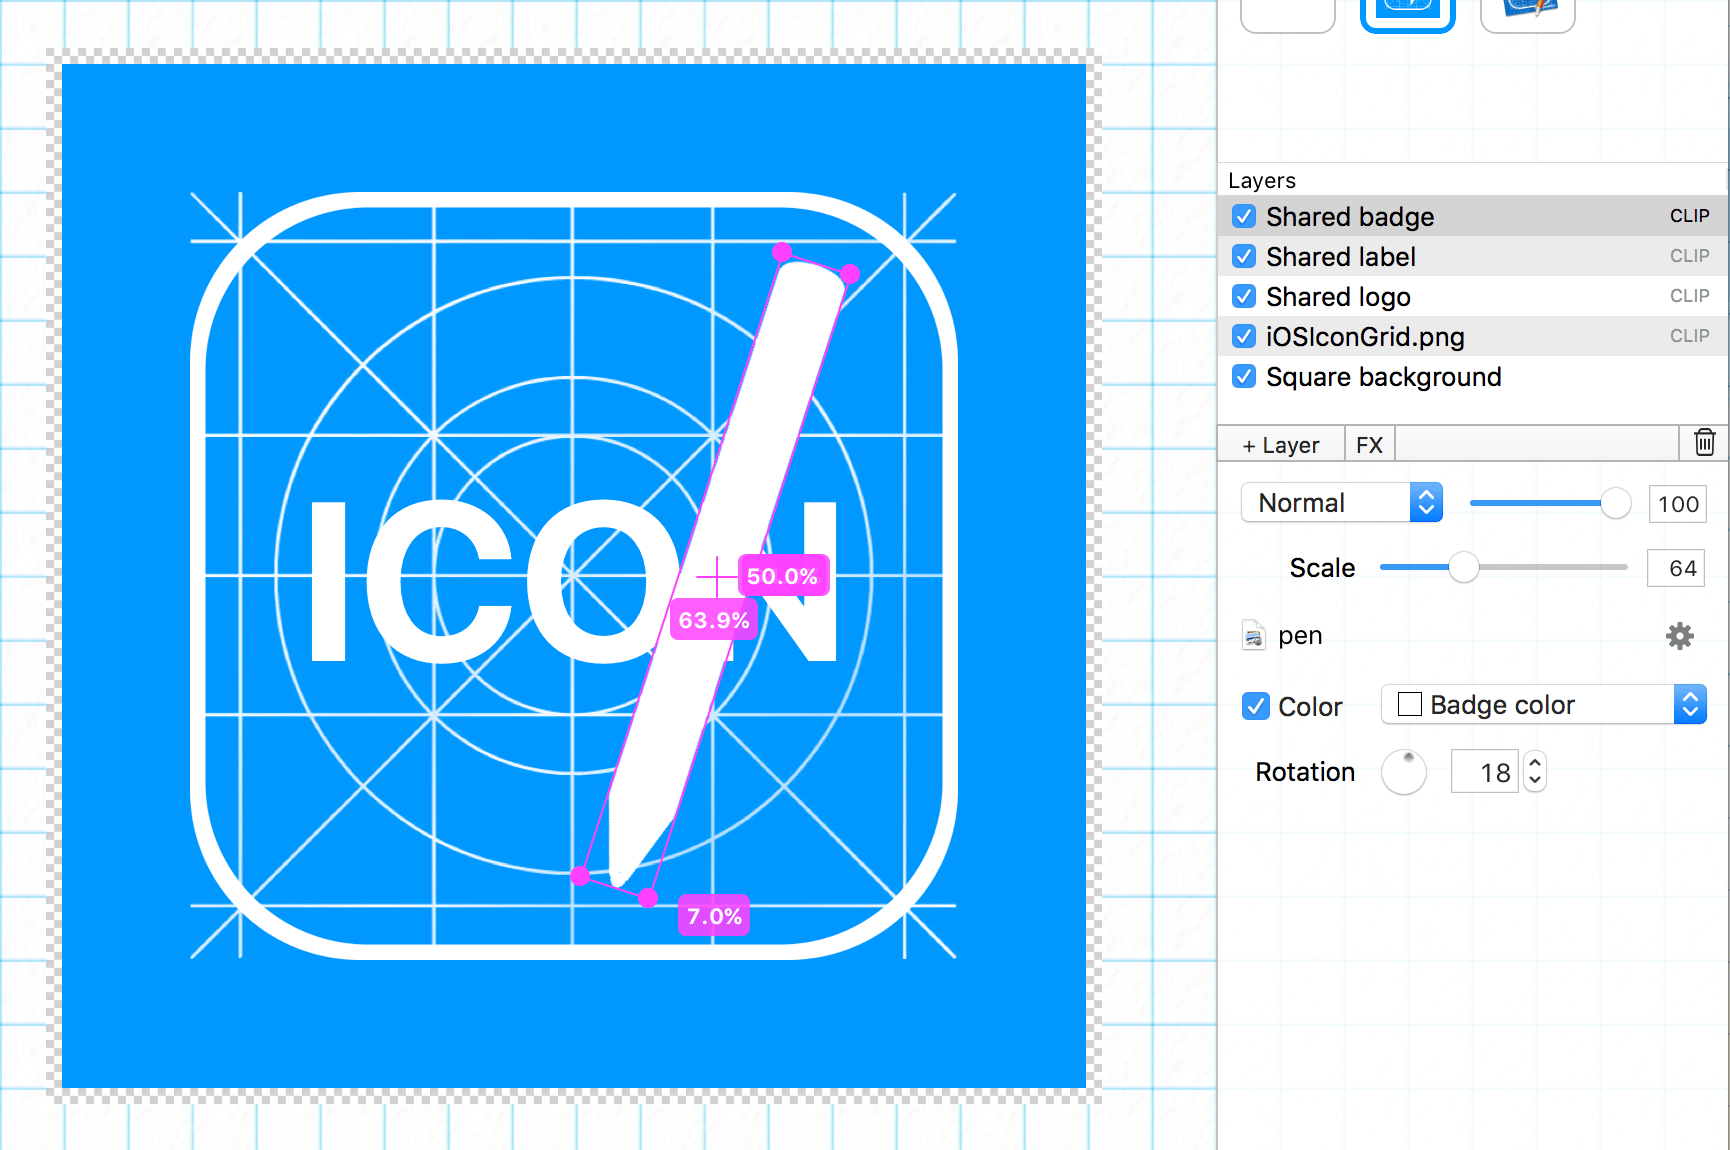
windowslayers3

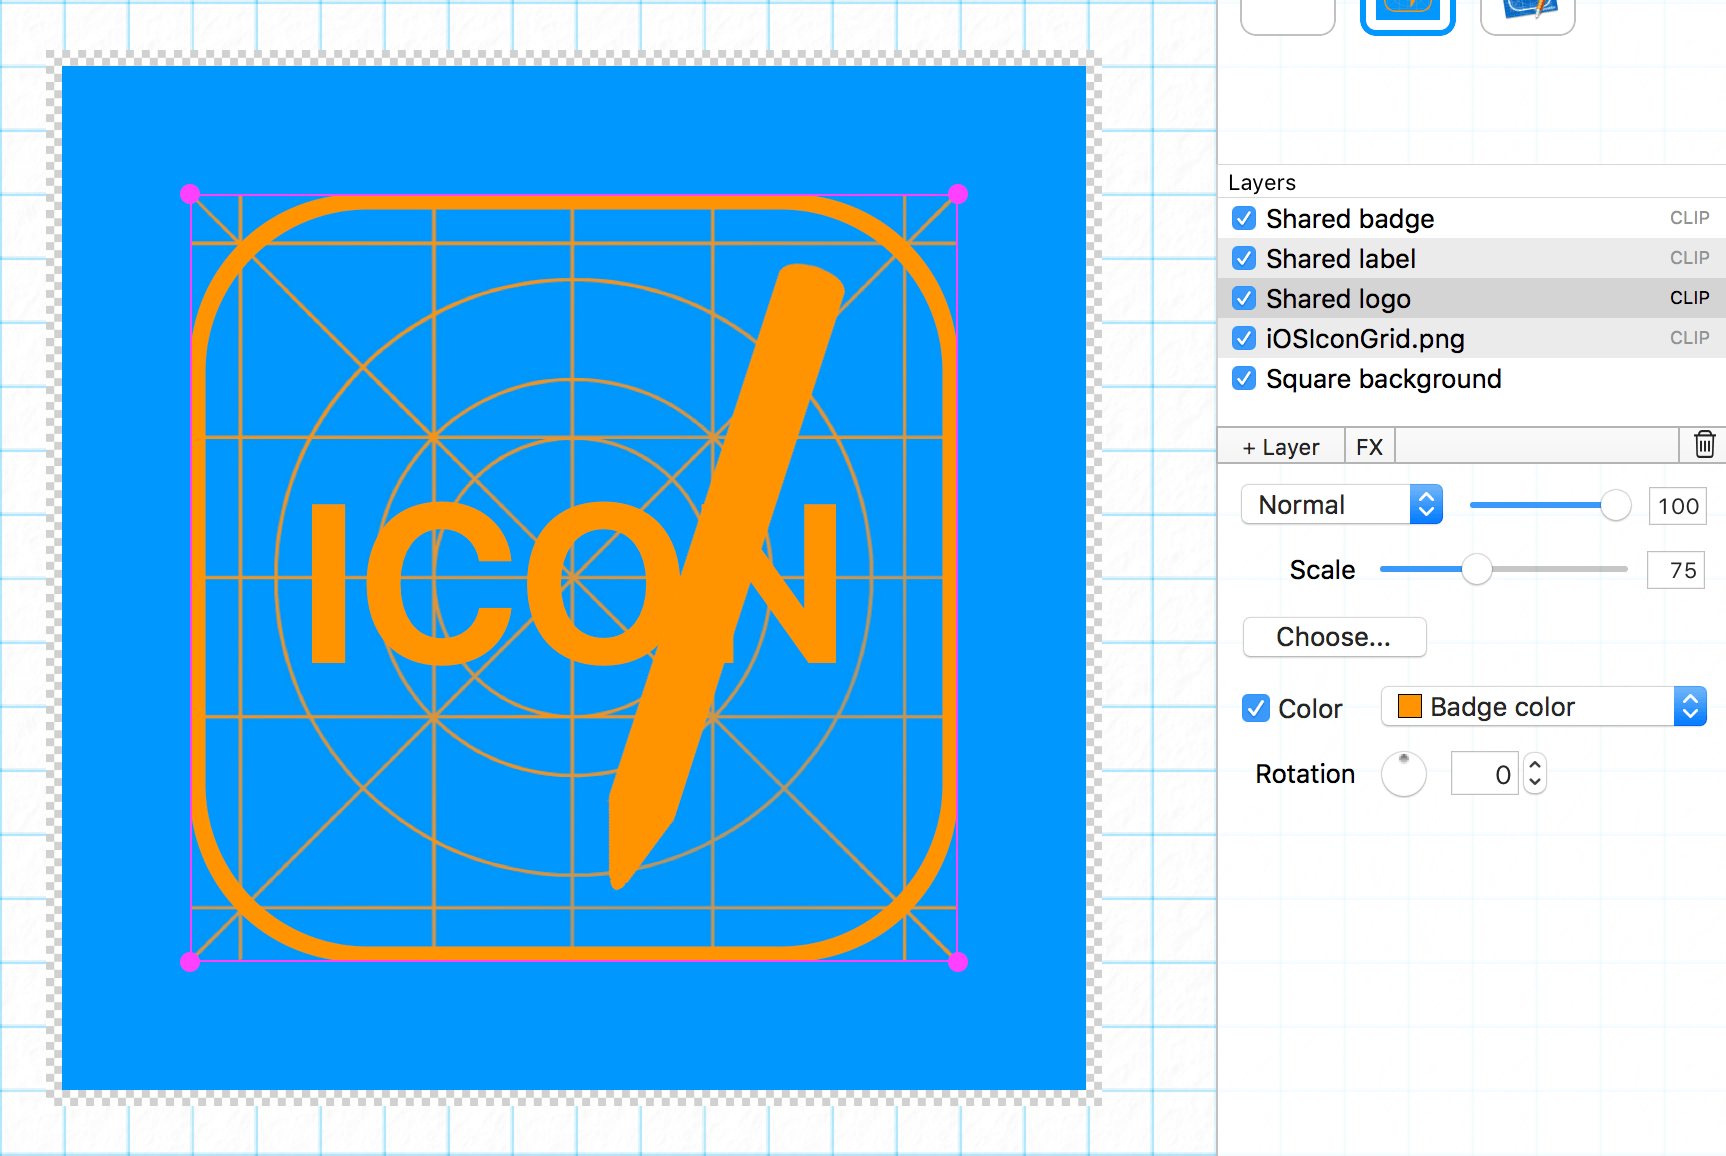
Much better; Windows 10 icons are white silhouettes on a plain colored background. Iconographer features a really nifty “Color” function where it will replace the colors of an icon with either a chosen solid color or a gradient. In this case we’re using the Badge color. Iconographer uses shared colors (as well as shared graphics and shared labels), when you adjust a color in one icon, it updates all your icons. If I set the “Badge Color” to be orange, all the elements using the Badge color get updated.

windowslayers4

Clicking on the “Preview” button again (the one in the bottom right hand corner), and selecting “Contact Sheet”, will show a contact sheet with the various sizes that a Windows icon can feature.

windowscontactsheetSort out the iOS icon. Clicking on the “iOS” target icon in the left hand column, shows me the following icon. I should point out that your default will vary, mine is very weird because of the elements I’ve used to create the Iconographer icon.

iosdefault

Again, once all the layers have been added, like it was done for Windows, it starts to resemble more of what we’d like.

iosstep2

Getting there, rearranging the layers, colorizing some and fixing the text, gives a far more pleasing result.

iosstep3

Now if we check out the “Preview” menu, we can even see what it will look like on the home screen of an iPhone or iPad and the App Store.

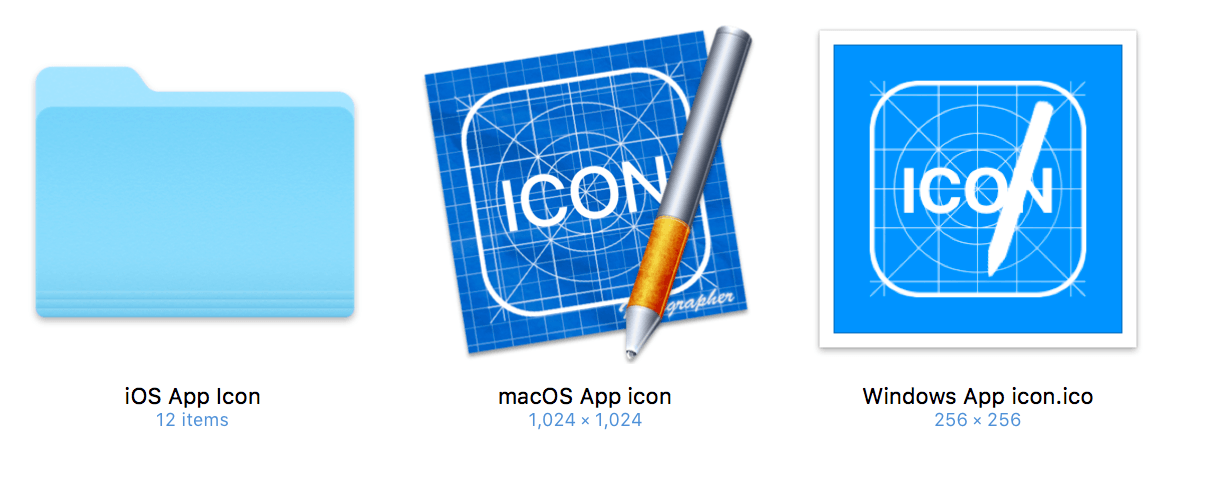
iospreviewNext, I simply select “Build all selected icons…” from the “Build Icon” button in the bottom left hand corner, choose a folder and let Iconographer do its job. It’s important to note that each icon can be customized as to what elements are included and some targets even have a file format option.

alltheapps

Wait… That’s not all Iconographer can do…

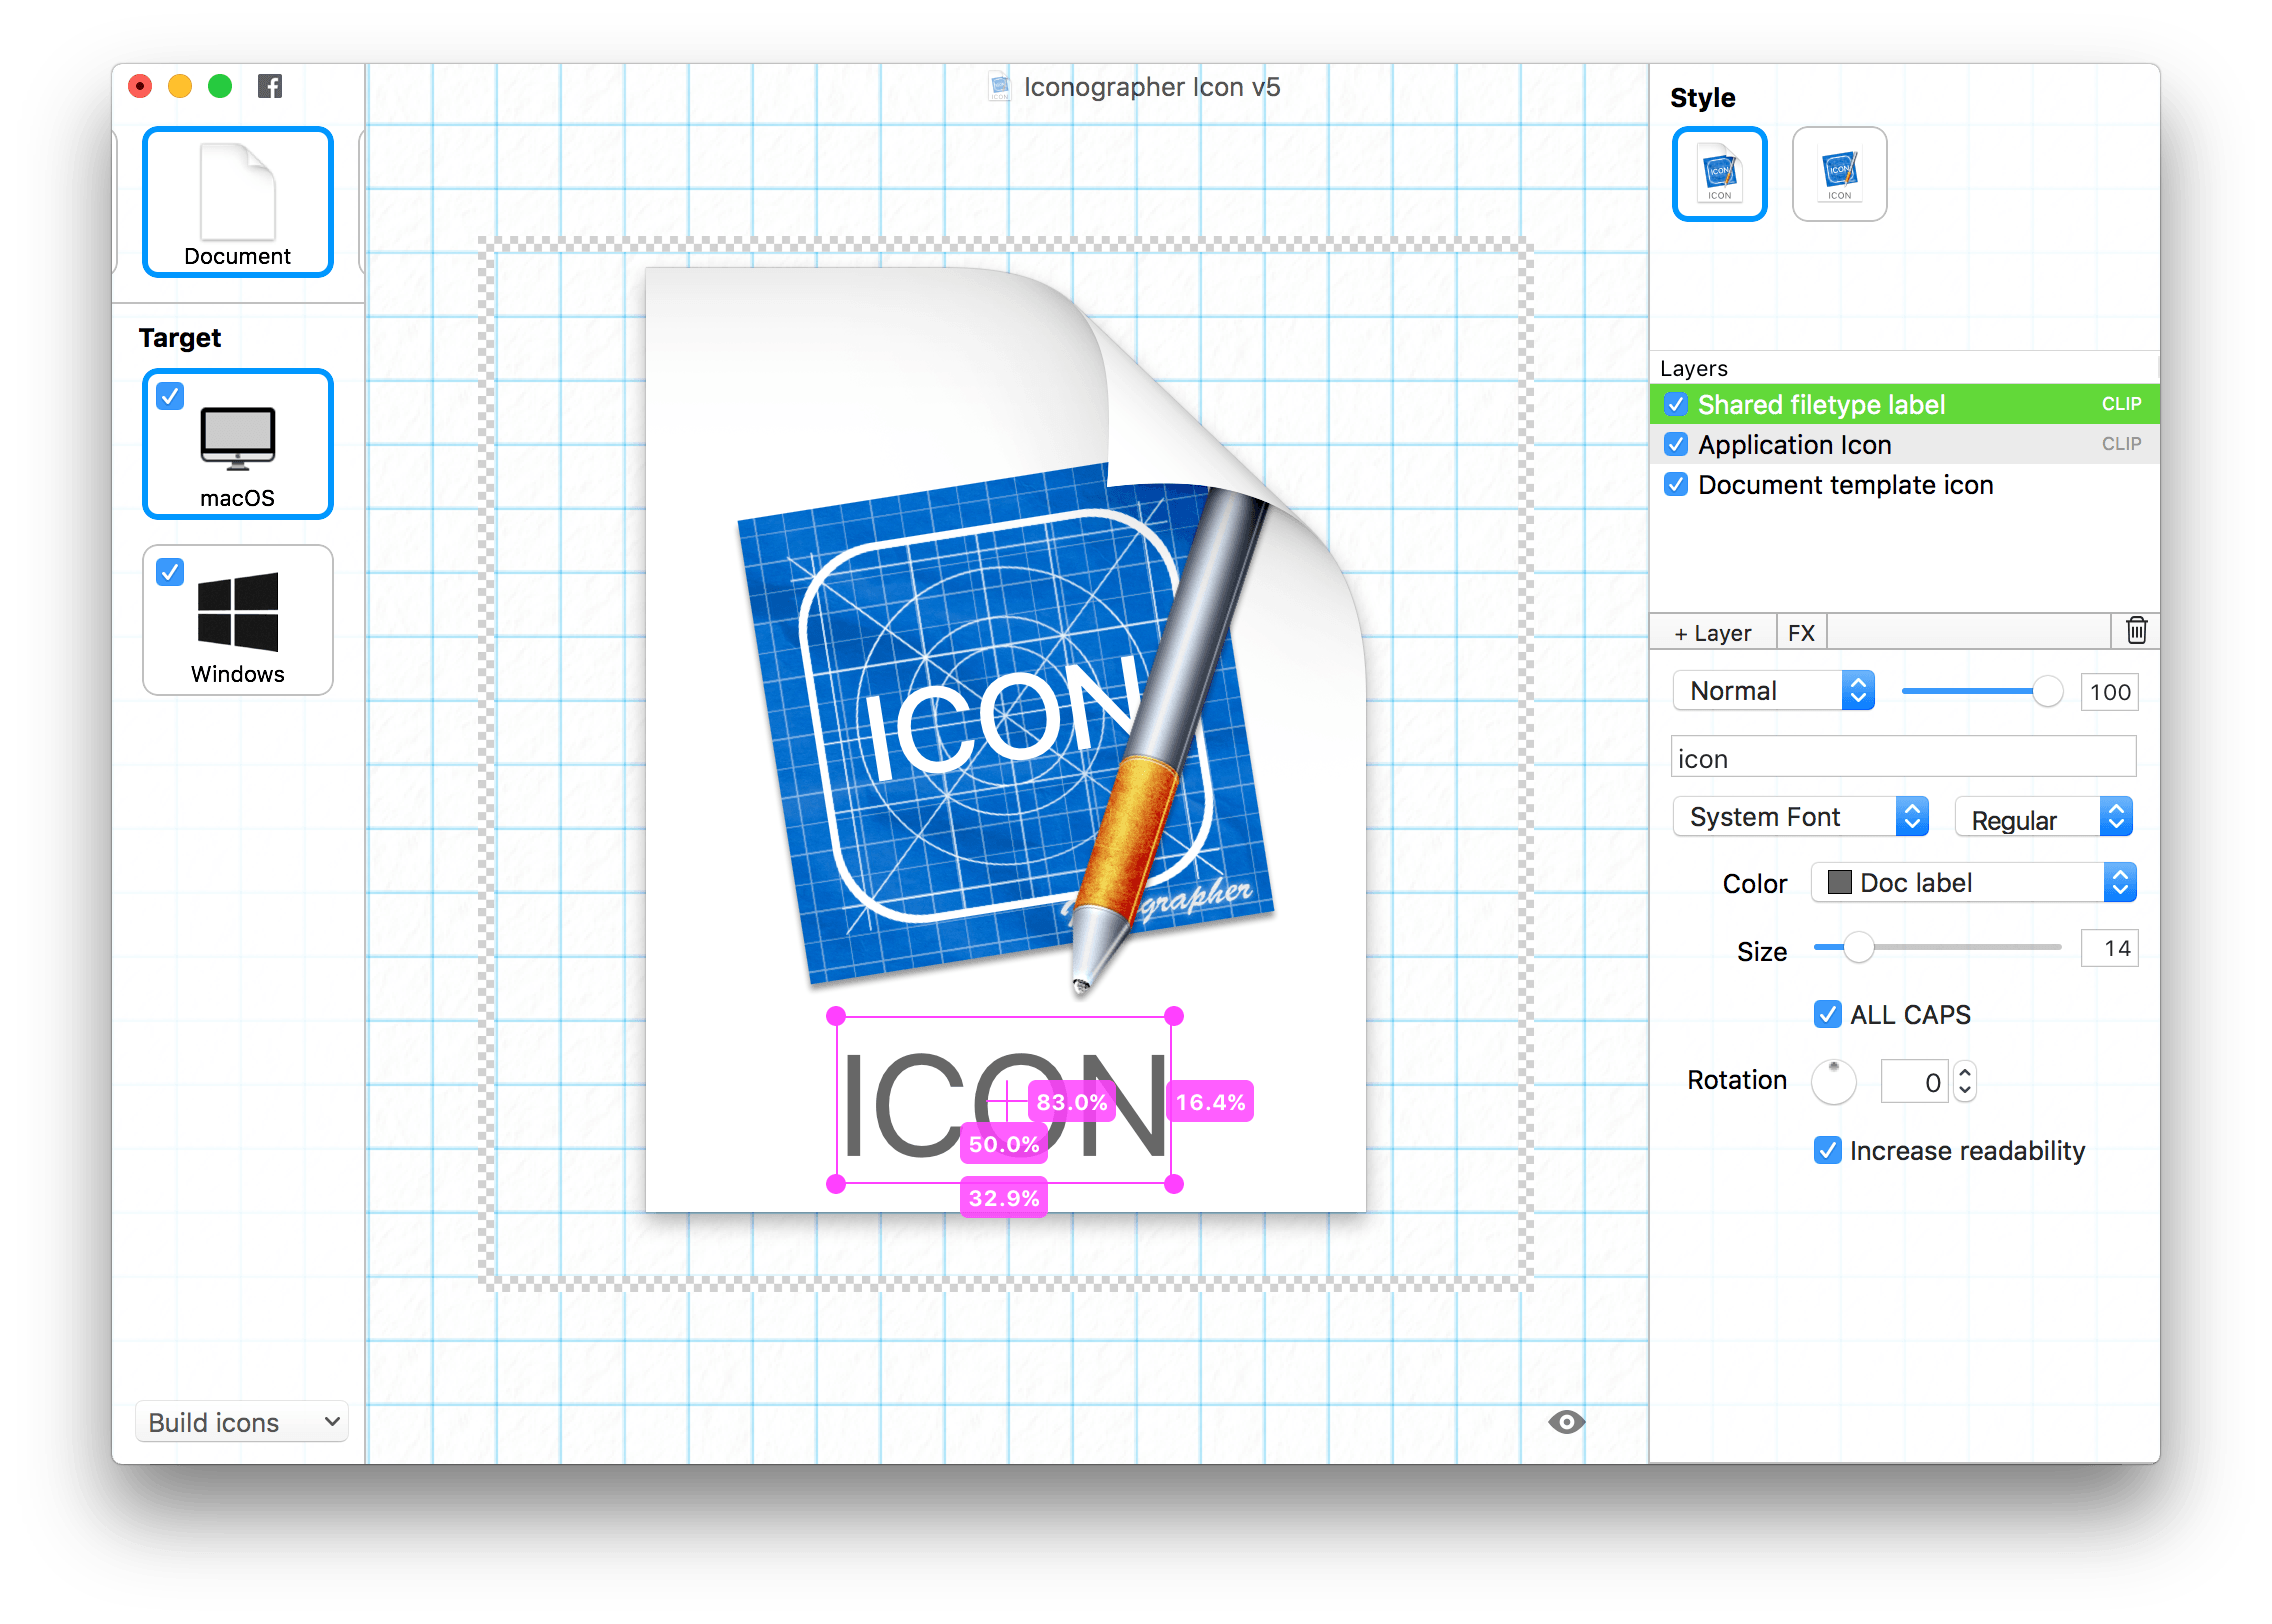
By selecting “Document” from the icon selector in the top left, there’s a perfect document file icon just waiting for me to export. If I change to Windows, there’s one there too and the Windows one is automatically using the Windows icon we adapted earlier.

documentscreenshotIf you study the screenshot, you’ll notice an option on the Label called “Increase readability”, we use a number of different options to make the text more readable as it gets smaller. It doesn’t work in all cases, but it is perfect for the label on a document file icon.

One more thing…
Clicking on the “Web icon” from the Icon selector, will allow you to create “Favicon.ico”, PNG versions and the Apple Touch variations.

I want to make the favicon.ico similar to the Windows icon as I think that will work better at smaller sizes. First; I go to the Windows application icon and select “Copy” from the “Edit” menu, then I go back to the Favicon target under the “Web Icon” and select “Paste icon style” from the “Editor menu. Since the favicon is tiny, I’ll also select “Overview” from the “View” menu, then click on the action icon in the “Overview” section and choose “16 x 16”.

faviconstep1After some tweaking of the sizes, changing the elements to use “Doc Label” color instead of “Badge Color” and even removing some layers, I’m happy with this icon as my favIcon. Very simple and clean.

faviconstep2

For the Apple Touch Icon, I’m going to wimp out and cheat. I select the third style and choose “iOS” as the icon. That’s right, I’ve remapped it to use the iOS icon, any changes I make to the iOS icon will also get updated here.

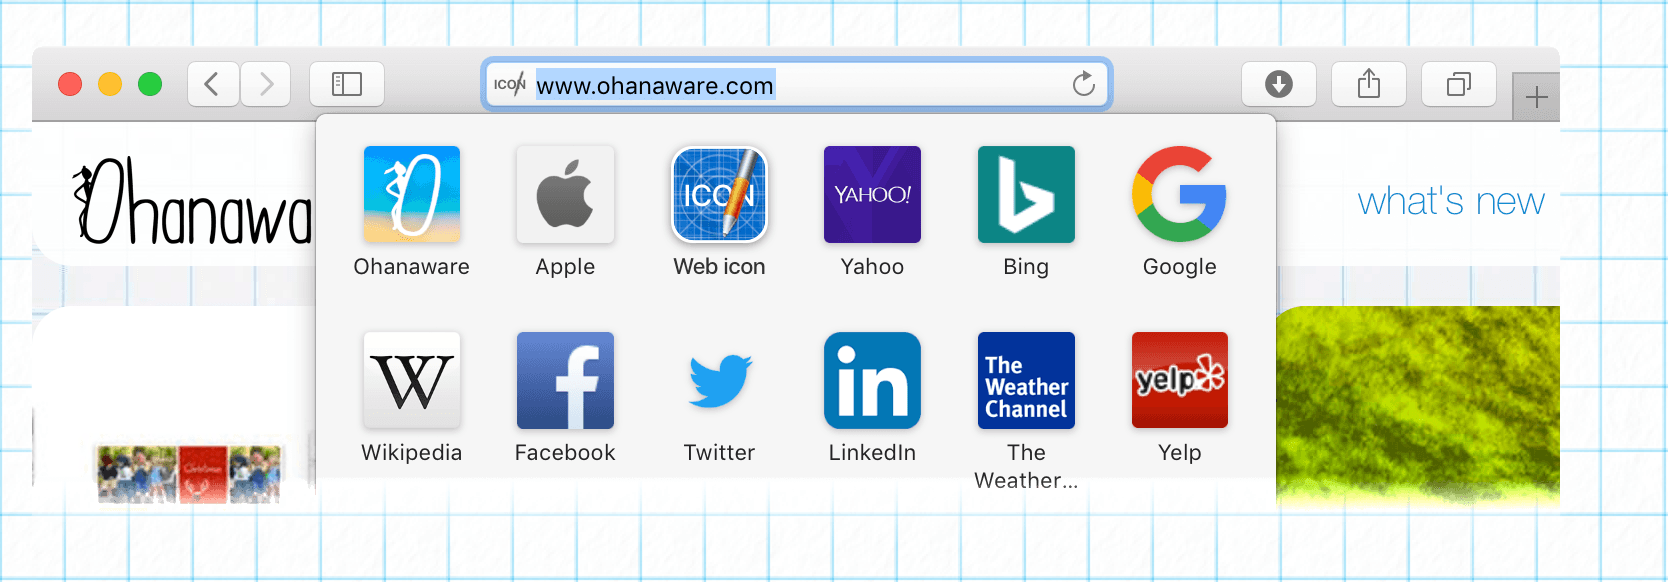
webpreview

Select “Safari” from the preview icon in the bottom right hand corner, and there we go, we get a Safari preview where you can see the favicon and the Apple Touch Icons in action.

To export these icons, simply select “Build all selected icons…” from the “Build icons” button.

There you have it, a quick walkthrough on how we took our Mac Iconographer icon and not only converted the icon for other targets, but we also made document icons and more in just a few minutes.

Give it a try yourself, get the trial version. For a limited time only, Iconographer is $9.99 at the Xojo Store. That’s a 50% savings over the regular price!

Is Microsoft bringing Visual Studio to the Mac?

$
0
0

It is likely that later this week, Microsoft will be announcing Visual Studio for Mac. Is this really true? Why would they do this? What does it mean for Xojo users?

Visual Studio for Mac

Earlier this year, Microsoft acquired the mobile development tools company Xamarin who had their own IDE which runs on Mac and Windows. Microsoft is going to be shipping that IDE branded as Visual Studio for Mac. So while there will be a product from Microsoft called Visual Studio for Mac, it’s not really Visual Studio.

Visual Studio for Mac (formerly Xamarin) is focused mostly on mobile development. For example, there’s no cross-platform drag and drop support for desktop user interface nor do I expect there will be as Microsoft has no shortage of software available for Windows. It uses C# and F# and is aimed at the professional developer, not the citizen developer for whom Xojo is primarily designed. Xojo, on the other hand, is for much more than mobile development. Xojo gives users an easy to use drag and drop interface designer with a simple, modernized BASIC syntax that builds applications for macOS, Windows, Linux, the web, iOS, Raspberry Pi and many other ARMv7-based devices. The web is one platform Xojo supports that is worth calling out since unlike ASP from Microsoft, building web applications with Xojo requires no knowledge of HTML, CSS, Javascript, AJAX, and PHP. With Xojo, building web apps is nearly identical to building desktop or mobile apps.

Why would Microsoft want to convert Xamarin into Visual Basic for Mac? While Microsoft is the 800-pound gorilla in terms of desktop market share, they are in a very distant third place on mobile. Their goal in buying Xamarin and marketing the Xamarin IDE as Visual Studio for Mac is to get developers building their mobile apps for iOS and Android in C# to make it as easy as possible to then port those apps to Windows 10 Mobile.  Their ultimate goal is to make more apps available for the relatively anemic Microsoft mobile platform.

For Xojo users, this doesn’t really mean much. While 25% of our users are full-time professional developers, most started as citizen developers and they are our primary focus as they make up 50% of our users. Having said that, our goal has always been to make Xojo easy for those learning programming for the first time, hobbyists, citizen developer and professionals. We will continue in our quest to make Xojo a tool that someone can use at any stage of their interest in software development.

Lastly, reporters enjoy hearing  from those that use a particular product or service they write about. If you read stories about Visual Studio for Mac, please write to the reporter and let them know about Xojo. The more people who talk about Xojo, the more likely we are to grow the Xojo community.

Join the discussion on the Xojo Forum here.

Design Patterns in Xojo: Observer, Part II

$
0
0

In previous blog entries we saw how easy it is to implement the Design Pattern Singleton and how we can find the Observer Design Pattern already implemented on several Xojo features by default, greatly simplifying our code and interaction between the objects. Now, as promised, it is time to put it all in practice, creating our own Notification Center: a class that will allow us to share the same unique instance for the entire App (Singleton), and that can use any object in order to register itself for receiving notifications by the observed Control, for one or more message (the notifications themselves).
In addition, the designed Class will allow you to unsubscribe any of the previously registered objects, either to stop receiving notifications by the observed object at all, or just some of the previously registered notifications.

The Singleton and Observer Design Patterns have been described in previous blog entries and I highly recommend to read them now so you can get the flavor of the fundamentals behind them. I’ll wait here for you, I promise! Then we will deal with the code that varies to implement our NotificationCenter class, and to put it in practice with a Desktop example project.

Of course, before of continuing reading, you can download the example project, run it and review the code to get a first glance of what it does and how it works. Then, you can come back and continue reading if you want to better understand the NotificationCenter class inner, or how other objects can use this class.

The NotificationCenter Class

Execute the Xojo IDE and create a new Desktop project. Add a new class using Insert > Class. Go to the Inspector and change the Name attribute to “NotificationCenter”. This is the name of the new class we are designing (and, thus, a new Data Type).

With the new class still selected in the Navigator (the leftmost column on the Xojo IDE), add a new Shared Property (Insert > Shared Property). Use the Inspector again to change the Name attribute to “Instance”, the Type field to “NotificationCenter” and the Scope to “Private”. (You know, a Shared Property or Shared Method are those that you can access from the class itself, without needing to create previously a new instance from the class.)

Add a second Property to the class, this time via Insert > Property (this is, an instance property). Use this values on the associated Inspector:

  • Name: Objects
  • Type: Xojo.Core.Dictionary
  • Scope: Private

Next, add a new Method (Insert > Method). Use the Inspector to choose the Constructor option from the “Method Name” dropdown menu, and set the method Scope to Private.

Write the following code on the associated Code Editor for the method:

Objects = new xojo.core.Dictionary

Defining the Constructor method with a Private scope prohibits the creation of several instances from the class. Instead of that, the class consumers will have to use the convenience method defined by us in order to retrieve the same —and unique— instance for all the cases.

So, now we will add a new Shared Method using Insert > Shared Method. Use the Inspector to put the following values on the created method:

  • Name: SharedInstance
  • Return Type: NotificationCenter

And write the following code in the associated Code Editor for the method:

if instance = nil then instance = new NotificationCenter
Return instance

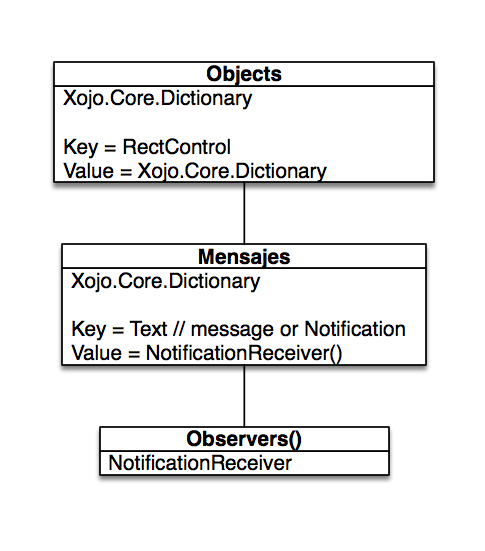
These are the wires to write our Singleton class and to define our Data Model: the “Objects” property of data type Xojo.Core.Dictionary. This property will be responsible for storing the registered objects as observers of the desired Control(s), as well as the messages for whom it is interested in receiving notifications for the observed object(s). Probably this is better understood in the following figure:

Data Model for Notification Center ClassThat is, the “Observers” Xojo.Core.Dictionary Property uses as Key any object of RectControl data type (the observed object). The associated value for that key is a new Xojo.Core.Dictionary, whose entries will use as Key the Notification (message as Text data type) for what an object wants to register as observer for such Control.

This way, one same object can be registered to several controls and also to several messages (Notifications) on one or several controls.

Finally, the associated value for every Key on this second Xojo.Core.Dictionary is an Array data type whose items are instances of the NotificationReceiver data type.

I know, I know… Stop. Breathe. Execute again the example project. Review the code on the “Register” method to get a better grasp… and back to follow!

Registering Observers

With the class still selected on the Navigator, add a new method (Insert > Method) using the following values. This is the method responsible for registering the new observers on the shared Notification Center instance:

  • Name: Register
  • Parameters: sourceControl as NotificationReceiver, observedObject as RectControl, message as Text
  • Scope: Public

As you can see in “Parameters”, the first parameter is the Observer object (this is the interesed object in receiving the notifications); the second parameter is the observed object (that is from which we want to receive notifications); and the third parameter is the message from which we are interested in receiving the notifications by the observed object.

Write the following code on the Code Editor associated for this method:

dim observedObjects as xojo.Core.Dictionary = Objects.Lookup( observedObject, new xojo.core.Dictionary )
dim messages() as NotificationReceiver
if observedObjects.HasKey( message ) then messages = observedObjects.Value( message )
messages.Append sourceControl
observedObjects.Value( message) = messages
objects.Value( observedObject ) = observedObjects

Sending Notifications

Now is time to add to the class the method responsible to send the notifications to those objects interested in receiving them from any previously registered object. Insert a new method for the NotificationCenter class and use the following values in the associated Inspector:

  • Name: sendNotification
  • Parameters: sourceObject as RectControl, message as text, value as Auto
  • Scope: Public

And the following code in the Code Editor associated with the method:

dim observedObjects as xojo.Core.Dictionary = objects.Lookup(sourceObject, nil)
if observedObjects <> nil then
  dim sourceObjects() as NotificationReceiver
  if observedObjects.haskey(message) then sourceObjects = observedObjects.Value( message )
  for n as integer = 0 to sourceObjects.Ubound
    dim target as NotificationReceiver = sourceObjects(n)
    target.valueReceived( value, message )
  next
end if

As you can see, the first parameter of the method is the control that wants to send a notification (second parameter) to all the possible registered objects, passing the value that such objects can be interested to receive for processing it (third parameter).

Stop receiving Notifications

However, it is probable that one object wants to stop receiving notifications from any previously registered control. For that, we need to add a new method to the NotificationCenter class using this values:

  • Name: RemoveObserver
  • Parameters: sourceControl as NotificationReceiver

And the following code on the associated Code Editor:

for each observedObjects as xojo.Core.DictionaryEntry in objects
  dim d as xojo.Core.Dictionary = objects.Value(observedObjects.Key)
  for each messagesForObject as xojo.Core.DictionaryEntry in d
    dim sourceObjects() as NotificationReceiver = d.Value(messagesForObject.Key)
    for n as integer = sourceObjects.Ubound DownTo 0
      if sourceObjects(n) = sourceControl then sourceObjects.Remove(n)
    next
  next
next

Stop receiving some Notifications

It may also be the case that one object wants to unsuscribe from the Notification Center to stop receiving just one particular notification. For that, add a new method and use the following values on the Inspector:

  • Name: removeObserverForMessage
  • Parameters: sourceControl as NotificationReceiver, message as text

And write the following code in the associated Code Editor:

for each observedObjects as xojo.Core.DictionaryEntry in objects
  dim d as xojo.Core.Dictionary = objects.Value(observedObjects.Key)
  for each messagesForObject as xojo.Core.DictionaryEntry in d
    if messagesForObject.Key = message then
      dim sourceObjects() as NotificationReceiver = d.Value(messagesForObject.Key)
      for n as integer = sourceObjects.Ubound DownTo 0
        if sourceObjects(n) = sourceControl then sourceObjects.Remove(n)
      next
    end if
  next
next

One Class Interface that runs them all: NotificationReceiver

Along the implementation of our Notification Center class we have seen several times the reference to the NotificationReceiver data type. This is what we are going to get our hands on next.

In fact this is a Class Interface; what means that it works as a “glue” in order that any object can implement their defined methods. This way the objects can be seen as their native class and also as an instance from NotificationReceiver, so they can be registered as observers on the Notification Center independently the native class they are based on.

Use Insert > Class Interface to add a new Class Interface to the project. Next, write the following values in the associated Inspector:

  • Name: NotificationReceiver

With the Class Interface still selected in the Navigator, add a new method using the following signature in the Inspector:

  • Method Name: valueReceived
  • Parameters: value as Auto, message as Text

Done! Depending on your own needs, you can add more methods for the interface class in combination with the Notification Center class itself.

Testing the Notification Center

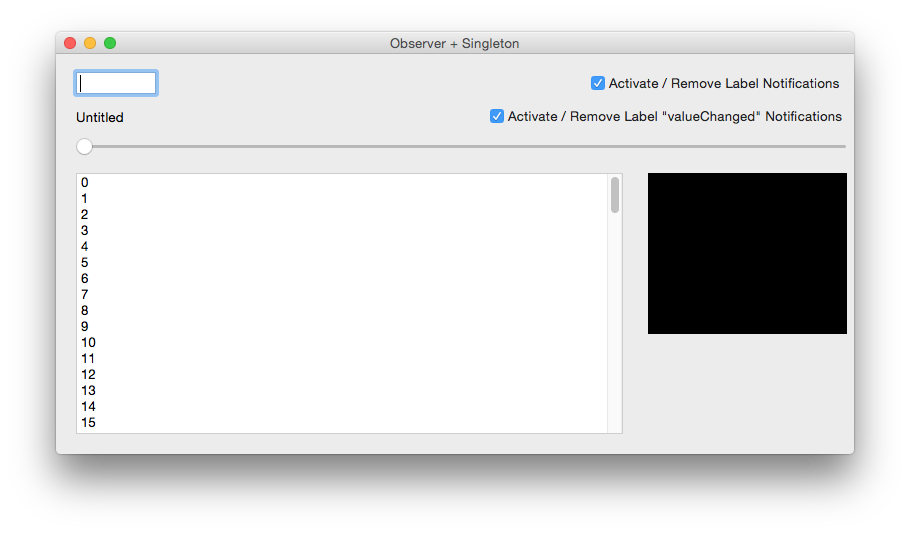
Now it is time to design the user interface in order to test the Notification Center class. The changes made on a TextField control will automatically update the contents of a Label control, a Slider control, a ListBox control and a Canvas control. Moreover, the Label instance will subscribe in the Notification Center to receive two types of notifications, changing his behaviour (the text shown) based on the received notification.

We will also add a couple of CheckBox controls to test the functionality to unsuscribe the Label control from all or just some notifications.

But before we start with that, and as we have seen in the previous step, we need that all the objects that want to be able to register on the Notification Center be of the NotificationReceiver data type. That means that we need to create our own subclases for the Label, Slider, ListBox and Canvas controles. Let’s start with the Label!

Label Subclass

Create a new sublcass for the Label Class. You can do that selecting the Label control from the Library and choosing the “New Subclass” option from the contextual menu; or you can drag and drop the control from the Library to the Navigator. Anyway, the result will be the same: you will have created a new subclass with the name “CustomLabel” (it can vary, depending the Xojo release you use). By the way, you also can use Insert > Class in order to create a new subclass.

Regardless of the method used to create the new subclass, choose it in the Navigator and use this values in the associated Inspector:

  • Name: MyLabel
  • Super: Label // This way, our sublcass will inherit all the methods, events and properties from the base class.
  • Interfaces: Click on the button and choose “NotificationReceived” from the resulting panel/Window. Confirm the selection clicking on the “OK” button.

As result of the last action, Xojo will automatically added the ValueReceived method to the class. Write the following code in the associated Code Editor:

RaiseEvent newValueReceived value, message

Here we raise a new event (not defined yet), so every instance from the class can be in charge of implement the real behavior in base of the parameters received.

So, with the “MyLabel” class still selected, use Insert > Event Definition to add the event definition we need. Use the following values in the associated Inspector:

  • Event Name: newValueReceived
  • Parameters: value as auto, message as Text

Slider Subclass

Add a new subclass and use these values in the associated Inspector:

  • Name: MySlider
  • Super: Slider
  • Interfaces: Add the NotificationReceiver Class Interface as seen in the previous step.

Write the following code for the ValueReceived method:

RaiseEvent newValueReceived val(value)

And add the event definition using Insert > Event Definition, as we have seen in the previous step. Use this signature in the Inspector:

  • Event Name: newValueReceived
  • Parameters: value as integer

ListBox Subclass

Let’s create now the subclass for the ListBox, following basically the same steps already done with the previous subclasses. Use the following values:

  • Name: MyListBox
  • Super: ListBox
  • Interfaces: NotificationReceiver

Write the following code in the Code Editor associated with the ValueReceived method added by the Class Interface:

RaiseEvent newValueReceived val(value)

And add the corresponding Event Definition using this signature:

  • Event Name: newValueReceived
  • Parameters: value as integer

Canvas Subclass

We have arrived to the last subclass definition for our example project. Add a new subclass to the project and use this values in the associated Inspector:

  • Name: MyCanvas
  • Super: Canvas
  • Interfaces: NotificationReceiver

Write the following code for the ValueReceived method:

dim s as string = value
newValue = s.ToText
me.Refresh

Next, use Insert > Event Handler to add the Paint event to the subclass. Write this code in the associated Code Editor:

dim size as integer = val(newValue)
g.TextSize = size
dim centerx as integer = g.Width/2 - g.StringWidth(newValue)/2
dim centery as integer = g.Height/2+g.StringHeight(newValue,g.Width)/2
g.ForeColor = rgb(size, size, size)
g.FillRect(0,0,g.Width,g.Height)
g.ForeColor = if(size <= 50, rgb(255,255,255), rgb(0,0,0))
g.DrawString(newValue,centerx,centery)

Lastly, add a new property to the subclass using Insert > Property, and using this values:

  • Name: newValue
  • Type: Text
  • Scope: Private

Designing the User Interface

Once we have created the subclasses for the Controls we will use as observers in our example app, it is time to design the user interface. For that, choose the window by default for the project (Window1).

Xojo will show the Layout Designer for the selected Window. Drag the subclass controls from the Navigator (or from the Library) so they are arranged as shown in this picture. In addition, drag a couple of CheckBox controls and one TextField too from the Library to the layout.

captura-de-pantalla-2016-11-10-a-las-13-23-55

Choose the label instance (with the name “Label2” in the example project) and use Insert > Event Handler to add the “newValueReceived” event handler previously defined in our class. Write the following code in the associated Code Editor:

dim s as string = value
Select case message
  case "valueChanged"
    me.Text = "Value on source Control: "+ s
  case "charValue"
    me.Text = "ASCII Code for last keystroke: "+ str(asc(s))
End Select

As you can see, the event uses the received message to decide how to work with the value sent by the observed object. In one case it will show the value as is, and for the other it will show the ASCII code for the value received as Text.

Select now the Slider instance (with the name “Slider1” in the example project), and repeat the action to add the Event Handler “newValueReceived” to the control. Write the following code in the associated Code Editor:

me.Value = value

In this case, the control will simply assign to his “value” property the value received.

Select now the ListBox instance (“ListBox1” in the example project). Add the Event Handler “newValueReceived” and write this line of code:

me.ListIndex = value

We will also add the “Open” Event Handler, so we can populate some default values to use in the example. Once we’ve added this event, write the following code in the associated Code Editor:

for n as integer = 0 to 99
  me.AddRow str(n)
next

Lastly, select the TextField instance (“TextField1” in the example project), and add the “Keydown” and “Lost Focus” Event Handlers. Once added, select the KeyDown event handler and write the following code:

dim myNotificationCenter as NotificationCenter = NotificationCenter.sharedInstance
myNotificationCenter.sendNotification(me,"charValue",key)

Next, select the LostFocus event and writhe the following code:

dim myNotificationCenter as NotificationCenter = NotificationCenter.sharedInstance
mynotificationcenter.sendNotification(me,"valueChanged",me.Text)

For both cases, we retrieve the shared instance from the Notification Center class and publish a new notification, passing along the own control as first argument (acting as originator), the message or published notification as second argument, and the value sent as the third argument. From this point on, the Notification Center will be in charge of propagate the received notification to all the interested objects.

Subscribing and Unsubscribing to Notifications

Let’s get in charge of the user interface controls whose function is to enable and disable the notifications for our MyLabel instance (Label1).

Select the CheckBox1 control, add the Action event handler and write the following code in the associated Code Editor:

dim miNotificationCenter as NotificationCenter = NotificationCenter.sharedInstance
select case me.Value
  case true
    miNotificationCenter.register(Label2,TextField1, "valueChanged")
    miNotificationCenter.register(Label2, TextField1, "charValue")
  case False
    miNotificationCenter.removeObserver(Label2)
    CheckBox2.value = false
end select

Select now the CheckBox2 control, add the Action event handler and write the following code:

dim miNotificationCenter as NotificationCenter = NotificationCenter.sharedInstance
select case me.Value
  case true
    miNotificationCenter.register(Label2,TextField1, "valueChanged")
  case False
    miNotificationCenter.removeObserverForMessage(Label2,"valueChanged")
end select

As you can see, in the first block of code we register the “Label2” control so it can receive both notifications when the checkbox value is True, and unsubscribe the control from receiving any notification when the checkbox is False. For the second block of code, the “Label2” control just subscribe or unsubscribe for one of the two notifications, respectively.

Starting engines!

What we need to put all to work? Add the Open event handler to “Window1” and write the following code.

dim miNotificationCenter as NotificationCenter = NotificationCenter.sharedInstance
miNotificationCenter.register(Label2,TextField1, "valueChanged")
miNotificationCenter.register(Label2, TextField1, "charValue")
miNotificationCenter.register(Listbox1,TextField1, "valueChanged")
miNotificationCenter.register(Slider1,TextField1, "valueChanged")
miNotificationCenter.register(canvas1,TextField1, "valueChanged")

This code will register the interested controls (observers) to the Notification Center for those Notifications they are interested in. Of course, this can also be done inside the Open event handler for every interested control!

In brief

As we have seen, with the combination of the Observer and Singleton Design Patterns, and the help of one Class Interface definition, we have created our own Notification Center from scratch to greatly automatice and simplify the communication between the objects, their processes and easying also the maintenance and extension of the app functionallity.

You can watch the video (in Spanish only) that talks you though this example.

Javier Rodri­guez has been the Xojo Spanish Evangelist since 2008, he’s also a Developer, Consultant and Trainer who has used Xojo since 1998. He is in charge of AprendeXojo.com and the developer behind the GuancheMOS plug-in for Xojo Developers and the Snippery app, among others.

*Read this post in Spanish

Raspberry Pi and Xojo: Configure for Remote Access

$
0
0

Xojo is a superb choice for developing and deploying apps for Raspberry Pi. After all, Xojo not only simplifies making the User Interface of your apps via drag and drop, it’s a modern and powerful object-oriented and event oriented programming language! As a result, you will have a native Linux app based on the ARM processor architecture for the Raspberry Pi.


The Raspberry Pi is a complete computer —and a very cheap one!— with USB, HDMI, Ethernet and an GPIO that gives the access to design, create, and control a lot of things (think IoT). The perfect combination to create and deploy complete solutions with Xojo.

Nevertheless, you probably don’t want to use an exclusive display, keyboard and mouse just to control and interact with your Raspberry Pi. What about accessing it remotely via SSH and/or VNC? I bet this is the first thought you had, and here is a step-by-step guide to configure it so you can use your current display, keyboard and mouse from you main computer (the one you use to run the Xojo IDE) to control the Raspberry Pi.

First of all, while you can access your RPi via SSH, displaying your well trained Geek super powers, it is really more convenient to control it via the GUI, as you do your computer. For that you’ll need a VNC client app. There are a lot out there, but VNC Viewer is one that runs just fine and is available for the main platforms. Just download it, run the installer, follow the steps… and you will have completed the first part of the process.

In order to access the Raspberry Pi from the VNC client you will need to know what IP address is using the Pi. How to get that information? Easy! (This assumes that your local network uses DHCP to assign IP addresses, the most common scenario.)

If you use macOS, open the Terminal app (Applications > Terminal) and run the command:

$ ping 192.168.1.255

Changing the ‘192.168.1’ part of the IP address for the one of your local network. What is important here is the ‘255’ number, because this is the Broadcast IP address for your local network.

What happens when we ping the broadcast address? In brief: the packets are sent to every host of the local area so they can respond, giving their IP address in the process. The second piece of the needed information, the MAC Address, is automatically obtained from the hardware interface used by the device to reply the packet request.

Let the ping command do its work for several seconds and break the process pressing Control + C. (If you are using Linux, execute the command as ‘ping -b xxx.xxx.xxx.255‘.

The Mac Address is all the information needed by ARP: the inner cache table used by your router/switch device (and computer too), to link the unique hardware address (MAC Address) used by every device in the network with the IP address used by the device. So, executing the command:

$ arp -a

will give us a complete list of evey active IP address and the linked MAC Address. Knowing what IP addresses are already used by the devices of our network (computers, printers, cell phones, tablets…), it will be easy to identify the IP address assigned by DHCP to the Raspberry Pi.

arp

So with these two pieces of information you can use the DHCP Binding feature of your home switch/router (all the home/SOHO routers have this feature), in order to assign the same IP address to the Raspberry PI every time you turn the device on and, connect it to the network. DHCP Binding looks for the MAC Address of the device… and matches it with the reserved IP address from the DHCP pool.

dhcpbinding

Starting the VNC Server on the Raspberry Pi

Don’t close the Terminal window yet, there are a couple of things that we need to do first. The first one is starting the VNC Server on the Raspberry Pi, so we can start new remote sessions from our client. For that we need to start an SSH session with:

$ ssh pi@raspberry-pi-address-here

Typing ‘raspberry’ as the password when requested. (‘pi’ and ‘raspbery’ are the user and password configured by default on every Raspberry Pi out there.)

Once started the SSH session, type the following:

pi@raspberrypi:~$ sudo raspi-config

configurationtool

This will open the Configuration Tool. Use the cursor keys to choose the ‘Advanced Options’ entry and press the Return key to advance to a new screen with options. Select the VNC entry (A5) and press the Return key again. Finally, make sure that VNC Server is enabled or enable it if not. Lastly, select the <Finish> option to exit the Configuration Tool.

Adjusting the Display Resolution used by VNC

Great, we have the IP address used by the Raspberry Pi, and the VNC Server enabled so we can start a VNC Client session… just to discover that it shows an endemic resolution of 800 x 600 pixels on our full-fledged Full HD display. Not the most productive thing we can expect.

Time to return to our Terminal windows, where the SSH session is still open (or start a new one if not). This time, we will edit the configuration file to instruct the Raspberry Pi to use a better fixed display resolution. For that, type the command:

pi@raspberrypi:~$ sudo nano /boot/config.txt

Go to the end of the opened file and write these lines:

 hdmi_force_hotplug=1
 hdmi_ignore_edid=0xa5000080
 hdmi_group=2
 hdmi_mode=51

In this case we are telling the Raspberry Pi to use a resolution of 1.600 x 1.200 pixels, but you can choose other changing the ‘hdmi_mode’ option to anyone of the settings you can find in this support page of Raspberry Pi.

Save the changes and exit from the Nano editor, and reboot the Raspberry Pi so the changes take effect:

 pi@raspberrypi:~$ sudo su
 pi@raspberrypi:~$ reboot

vnc-session

Ready! From now on, you can remotely access your Raspberry Pi via VNC and SSH.

You can watch the video (in Spanish only) that talks you though this example.

Javier Rodri­guez has been the Xojo Spanish Evangelist since 2008, he’s also a Developer, Consultant and Trainer who has used Xojo since 1998. He is in charge of AprendeXojo.com and the developer behind the GuancheMOS plug-in for Xojo Developers and the Snippery app, among others.

*Read this post in Spanish
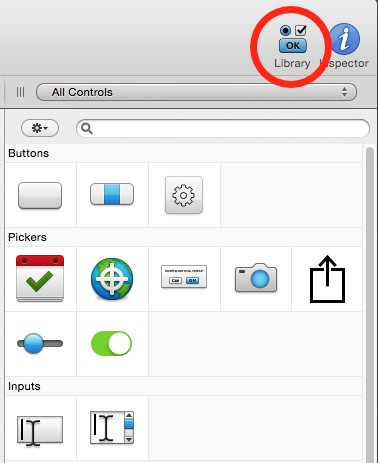
Livin’ La Vida Linux

$
0
0

Do you live the Linux life? If so, you might want to try Xojo on Linux to see how easy it is to make your own apps. Xojo works on a variety of Linux distributions, but in this post I’ll cover three specific 64-bit ones that work well with Xojo: Linux Mint 18, Ubuntu 16.10 and openSUSE Leap 42.2. Be sure to also read on even if you are not yet a Linux lover because it’s super-easy to set up Linux in a virtual machine to play around with!

Linux Mint 18 “Sarah”

Linux Mint is my favorite Linux distribution. I like its overall look (with the Cinnamon desktop) and I find it to be pretty speedy. You can download a Linux Mint ISO to install (I recommend the 64-bit Cinnamon version) from the official web site: Linux Mint 18 64-bit Cinnamon

I use VMware Fusion on macOS Sierra to run Linux in a VM. Simply choose to create a new VM and drag the ISO you downloaded into the window. Follow the prompts to set up and install the OS. Any VM software will work, of course.

Once you have Linux Mint 18 up and running, it can actually run the Xojo IDE without any additional tweaking. But I recommend you also install the webkit library so that the built-in Reference Guide viewer works (otherwise you’ll be redirected to your web browser when you want to view the docs). To install this library, open a Terminal window and type this command:

sudo apt-get install libwebkitgtk-1.0:i386

Now you can download the Xojo Linux tgz, expand it and run Xojo (just open the folder and double-click the Xojo app) to start making your own 32-bit or 64-bit apps! This is what Xojo looks like running on Linux Mint:

2016-12-13_15-33-28_01

Ubuntu 16.10

In my opinion, Ubuntu has gotten much better since Ubuntu 15 and Ubuntu 16.10 is also pretty great. I got the Ubuntu 16.10 64-bit ISO from the official site: Ubuntu 16.10 Desktop 64-bit

Again, I installed it as a VM in VMware Fusion.

Before you can use Xojo with Ubuntu you do need to first install 32-bit libraries. To install the libraries, open a Terminal window and enter these commands:

sudo dpkg --add-architecture i386
sudo apt-get update
sudo apt-get install libc6:i386 libncurses5:i386 libstdc++6:i386 libglib2.0-0:i386 libsoup2.4-1:i386 libgtk2.0-0:i386 libwebkitgtk-1.0:i386

Now you can download the Xojo Linux tgz, expand it and run Xojo to start making your own 32-bit and 64-bit apps! This is what Xojo looks like running on Ubuntu:

2016-12-13_15-45-19

openSUSE Leap 42.2

I hadn’t used openSUSE in a while, so was surprised to see the version now being at 42.2. But as everyone knows, 42 is a great number! You can download Leap from the official site: openSUSE Leap 42.2

As with Ubuntu, before you can use Xojo with openSUSE you’ll need to first install a few libraries. For this OS, I had to install the libraries using the user interface rather than the command line since from what I could tell, the “yum” tool is not pre-installed. To use the UI, click the Application menu button (lower left) to open the application menu and choose “Configure Desktop” from the left side. In the System Administration section, select YaST. In YaST, click on Software and then Software Management.

Here you can search for libraries to install. First, search for this library: glib2-devel-32bit. Select it in the list and click the Accept button. You’ll be prompted to install related libraries.

Next, you’ll want to search for this library: libgtk-2_0-0-32bit. Select it in the list and click the Accept button, allowing any related libraries.

Lastly, search for this library: libwebkitgtk-1_0-0-32bit. Select it in the list and click the Accept button, also allowing any related libraries.

Now you can download the Xojo Linux tgz, expand it and run Xojo to start making your own 32-bit and 64-bit apps! This is what Xojo looks like on openSUSE:

2016-12-13_15-56-35

Get Started with Xojo

If you are new to Xojo, head on over to the Get Started page in the Xojo Dev Center for links to QuickStarts, tutorials, videos and other materials that will help you get started making your own apps.


Viewing all 882 articles
Browse latest View live